

Designing a Great Wooden Sauna Floor: Drainage and Airflow Explained
The sauna floor is a surprisingly important detail for the sauna experience. In this article, I reflect on the desirable qualities of a sauna floor, present the structure of the wooden floor in my own sauna cabin, and consider the importance of the floor for sauna ventilation.
The most important stage of the sauna journey begins with contact with the floor. The touch of a bare foot on the sauna floor gives the first sensations of heat within. The expectation of a Finnish sauna floor is that it feels warm, solid, and perhaps slightly damp. The floor is not so hot, unlike in Turkish hammams, that footwear is required, nor so slippery that walking on it becomes an exercise in balance. The floor must also inspire confidence in its load-bearing strength, so that stepping onto it never feels unsafe.
The experiential requirements for a sauna floor are therefore clear:
- pleasant to the touch at different temperatures,
- slip-resistant even when wet, and
- solid underfoot.
Different wood materials are well suited to sauna floors. Wood conducts heat poorly and therefore feels tolerable whether hot or cool. There are some differences between wood species in moisture behavior, wear resistance, and slipperiness, but any surface treatment can affect these characteristics just as much. For surface treatment, it is not worth aiming for a hard lacquer finish that is waterproof but also slippery.
More solid options
Concrete, whether left bare or coated, is one common sauna flooring option in both summer cottages and residential homes. Bare concrete provides good grip, but it absorbs water and is especially unpleasant when cold. Concrete can of course be tiled, and underfloor heating elements can be embedded in it so that electricity or hydronic circulation can warm the floor to a comfortable level. The sensation of a cold floor can also be reduced with separate wooden duckboards.
Different ceramic tiles can also be suitable for a sauna floor, provided that they have an appropriate surface texture to prevent slipping. Floor tiles are classified and marked for different uses, including slip resistance and moisture behavior, so it is worth confirming before purchase that a tile matching the sauna style is also suitable for sauna use. More information on tile classifications and properties can be found, for example, in Kaakelikeskus’s guide.
What wood should you use for the floor? Raw timber or thermowood
A Saunologia reader prompted me to add this section on wood material choices for flooring on August 11, 2017, the conversation is between two options, pine and spruce.
The type of wood you choose for the floor is not insignificant. Between spruce and pine, spruce has the advantage. Dry spruce repels water more effectively than pine. In addition to the experiential qualities, the durability of the floor may also be a concern. Few people want pressure-treated wood indoors.
If you are concerned about the floor’s moisture resistance from a building-technical standpoint, you may want to consider thermowood. In terms of biological stress, primarily moisture, timber has five use classes in standard EN 335-1. Of these, class 3 roughly corresponds to sauna conditions, meaning a use environment that is “frequently or repeatedly damp.”
Thermowood is classified as suitable for repeatedly damp conditions, though not for continuously wet ones. It is certainly a longer-lasting flooring material than untreated timber if you have doubts about how well the floor will dry.
In the case of a sauna floor, it must be noted that if the sauna’s ventilation works well and the sauna is properly dried after bathing, the durability of the floor should not become an issue. The floor of my own sauna is already surface-dry half an hour after washing and has now lasted in a very good condition after eight years of intermittent use.
If you use thermowood, you must remember that it also brings its own scent. It is worth testing in advance whether you like it, because the smell does not disappear quickly. Thermowood also cannot be tinted during the first year, so you have to live with its copper-brown tone.
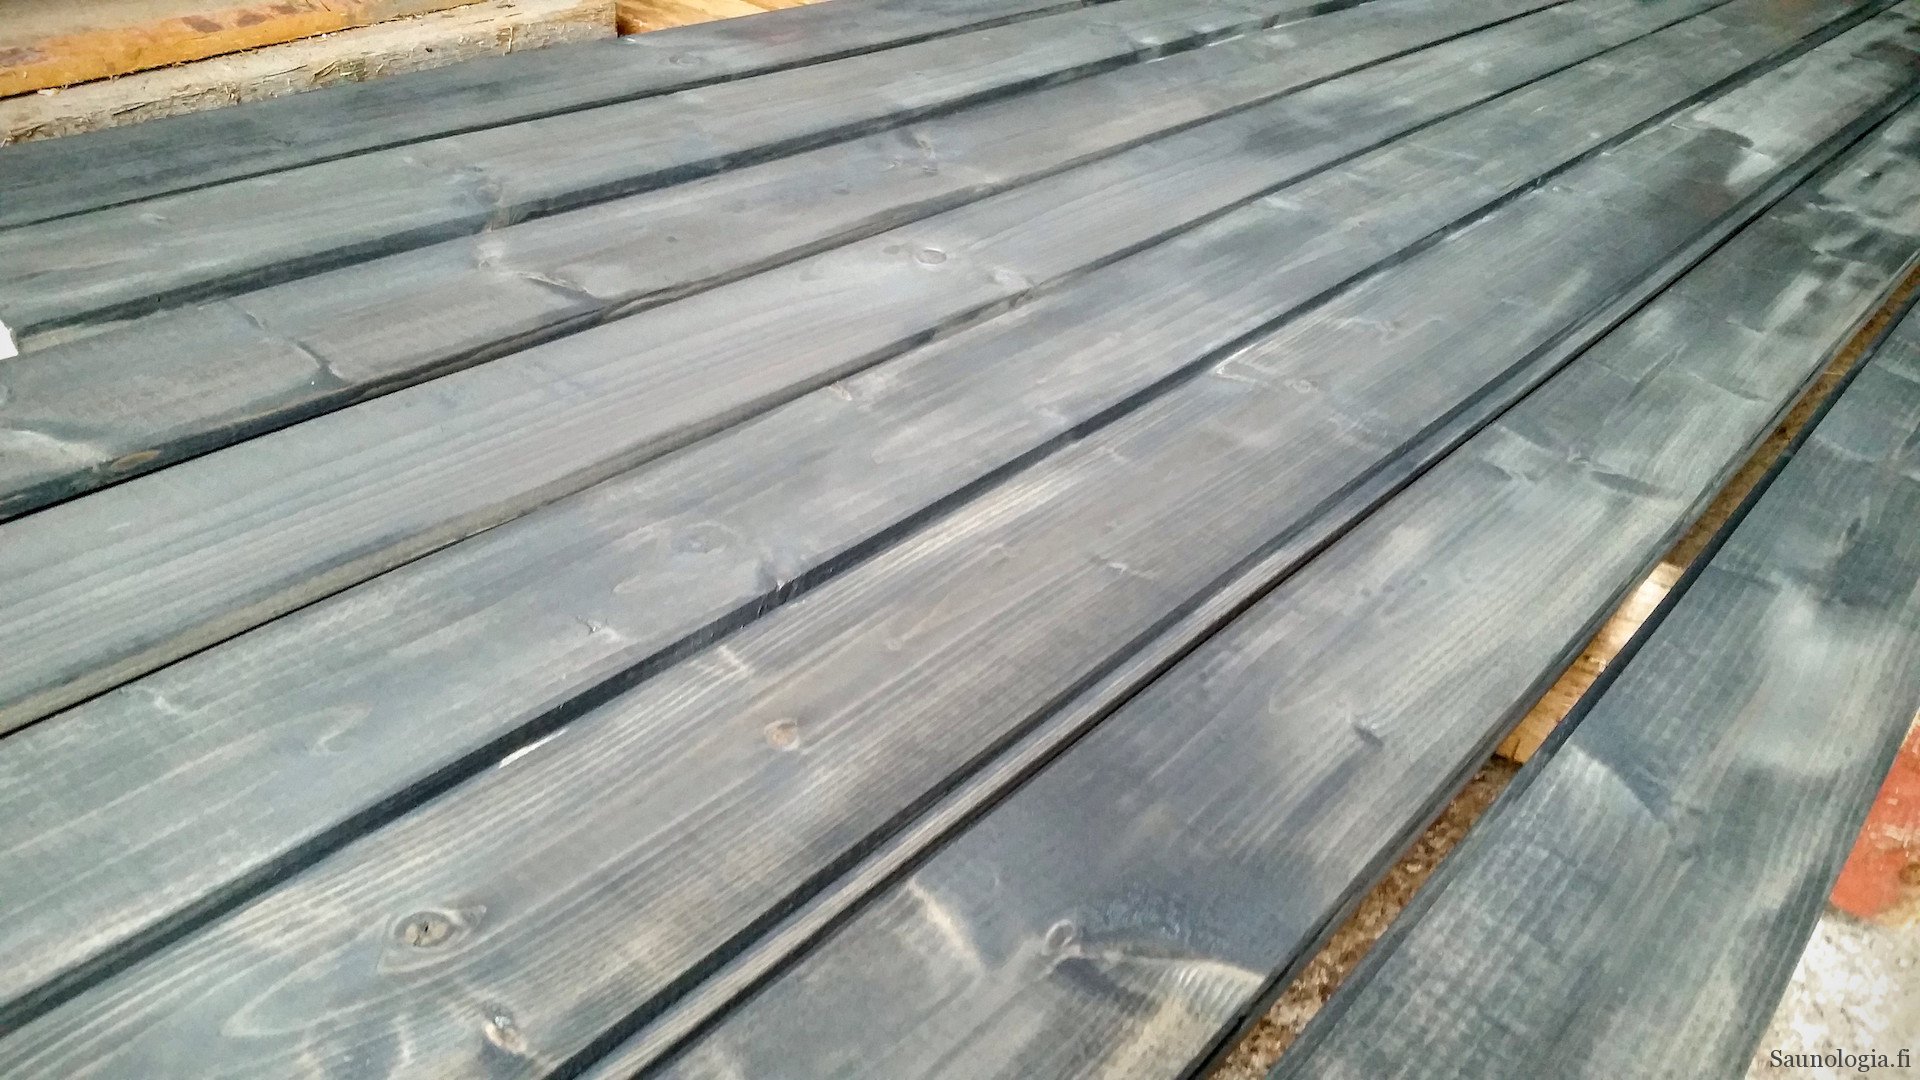
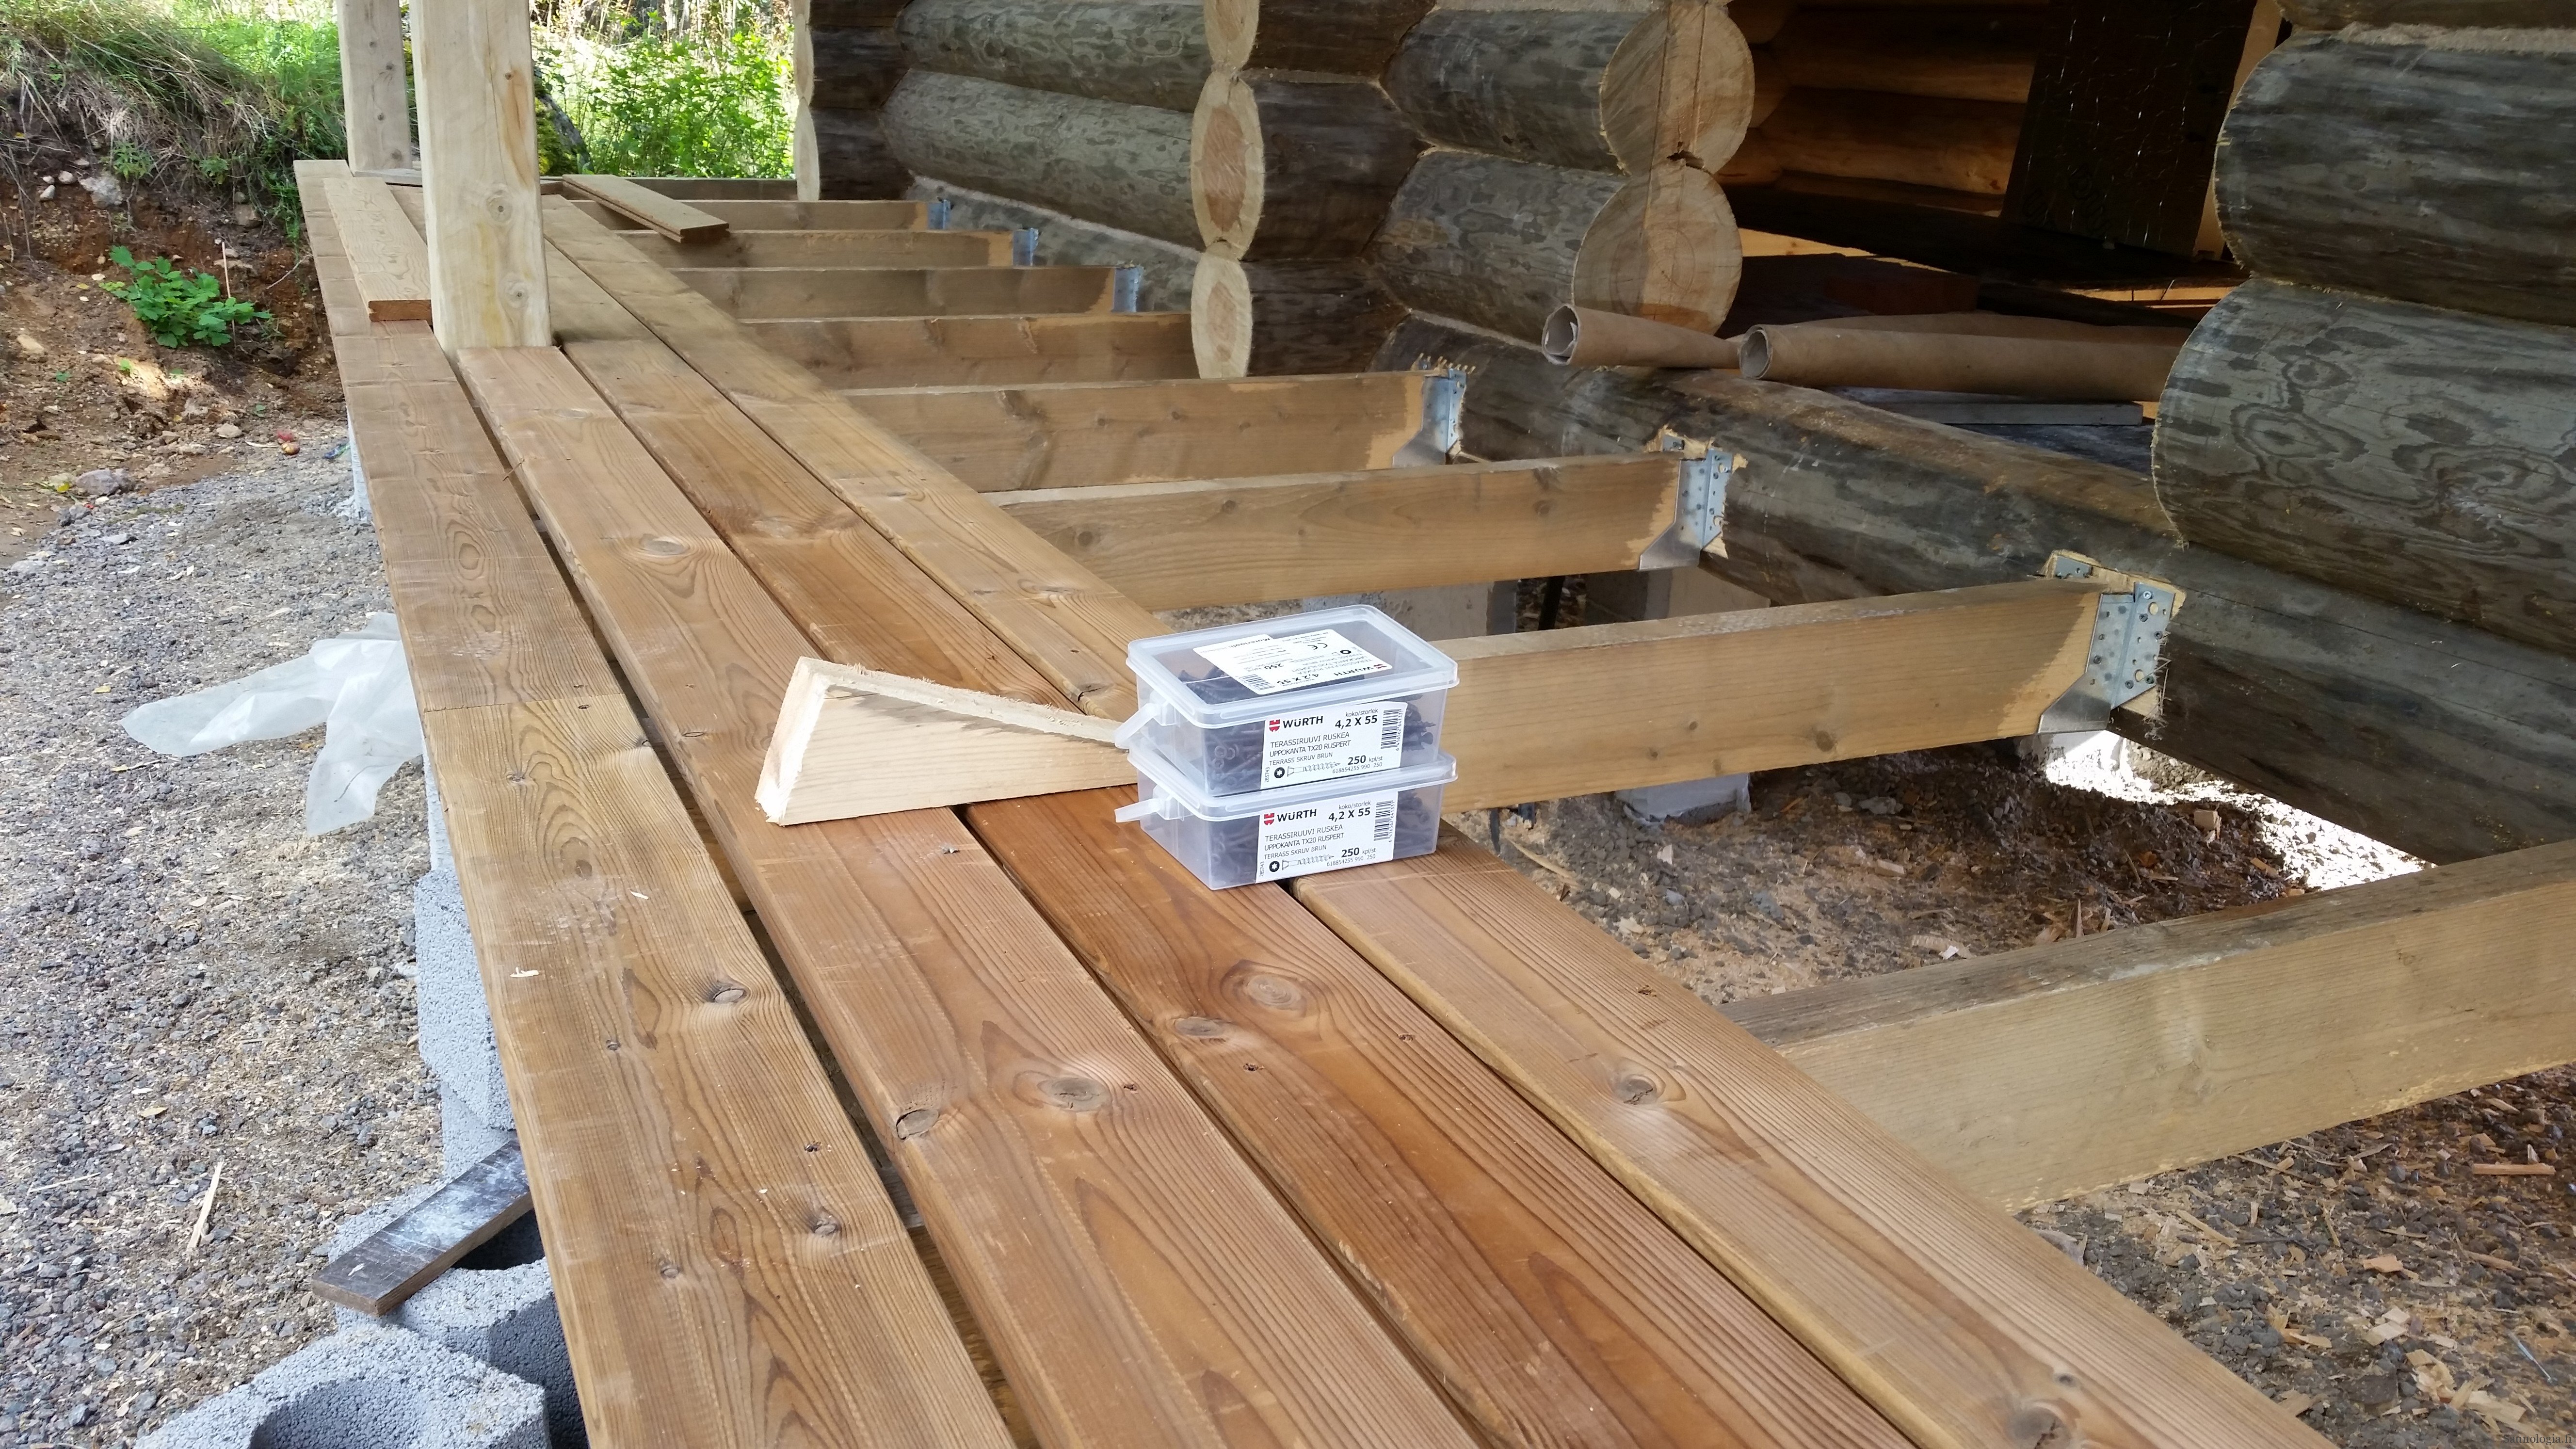
For my own sauna, I chose unfinished tongue-and-groove spruce boards measuring 90 x 28 mm (about 3.5 x 1.1 in) as the flooring material. Spruce is not a perfect sauna floorboard, because it tends to have various irregularities such as resin pockets, which in addition to appearance also negatively affect how the floor dries. Spruce was a kind of compromise for a solid floor, driven by budget constraints and logistics. If wider boards had been available, I would have used them.
Surface treatment of a wooden sauna floor
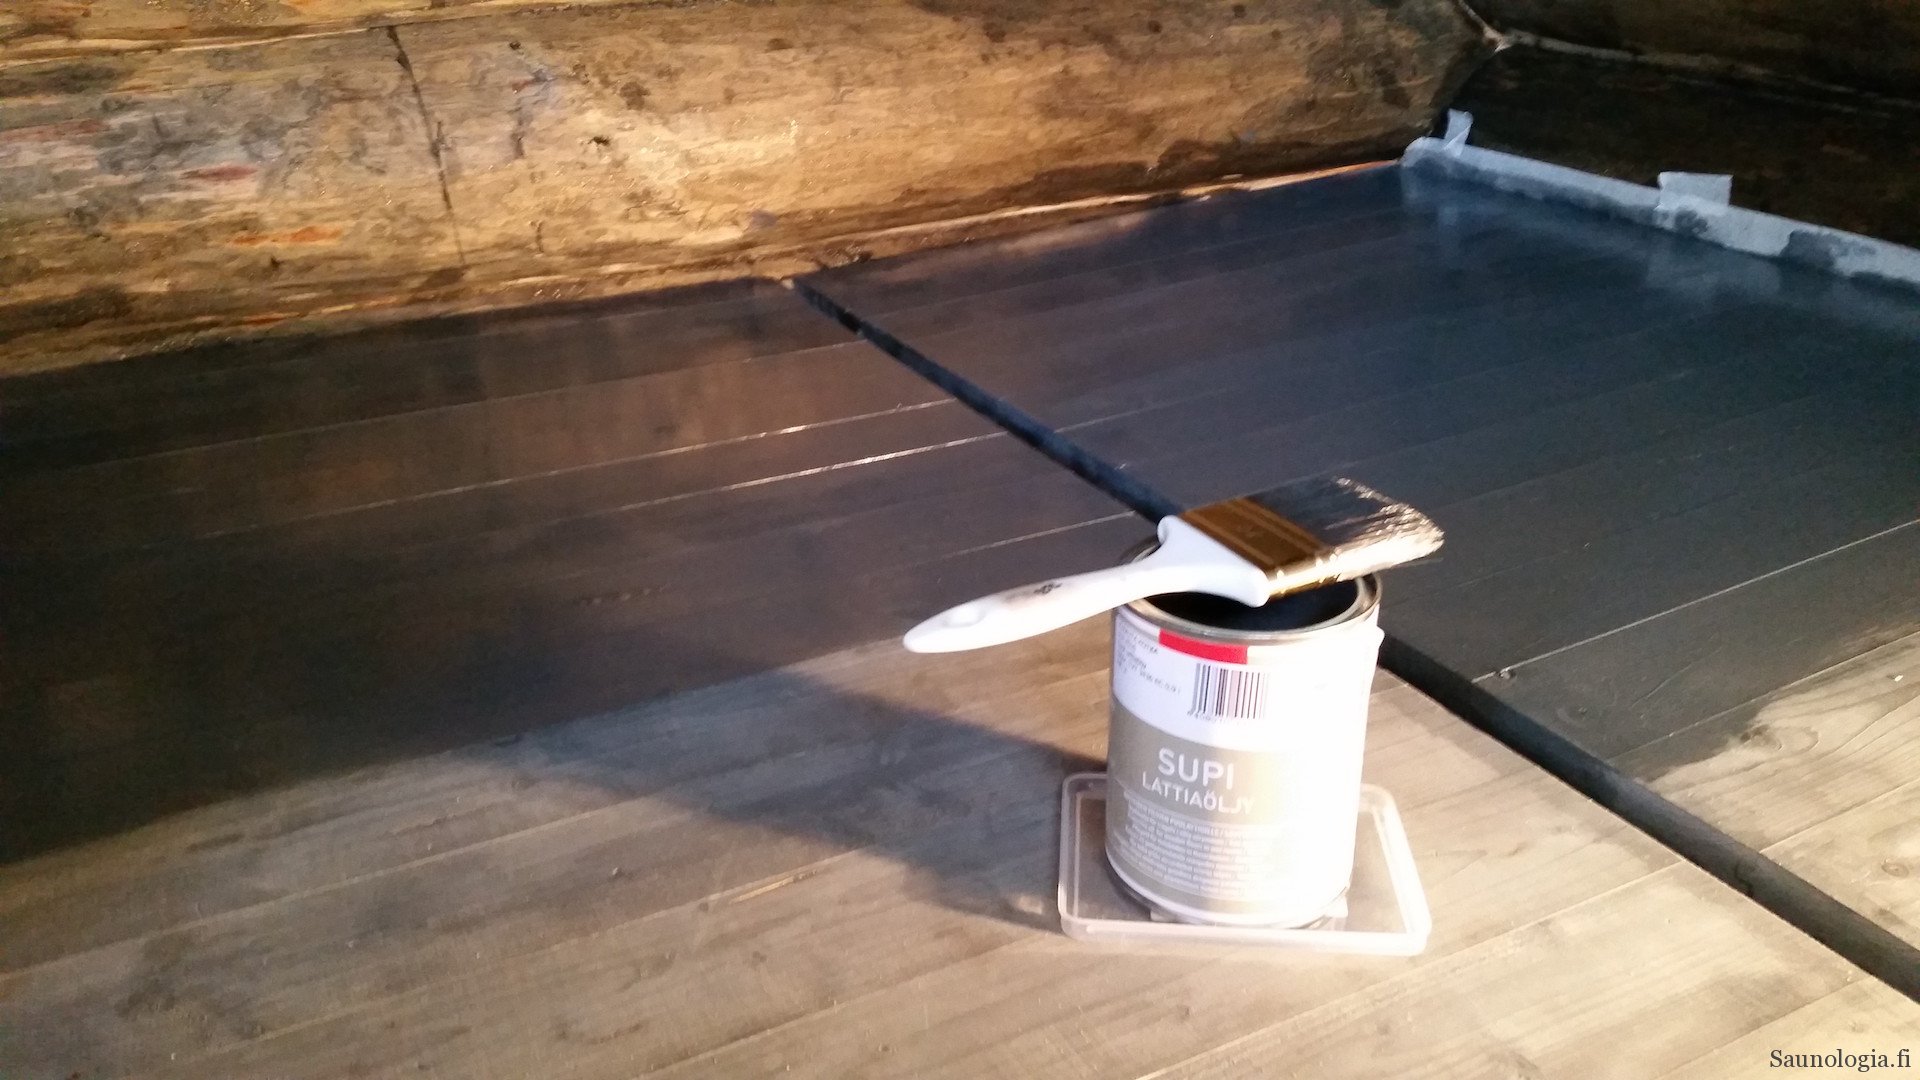
Painting or oiling improves the durability of a wooden floor by preventing the boards from getting soaked. I am describing options widely available in Finland. I treated the floor with Tikkurila’s tinted Supi Floor Oil, supplied through K-Rauta, which sponsored my project back in the day. Tikkurila does not disclose the raw oil used in the product, but the mention of vegetable oil suggests something familiar such as linseed oil. The product was tinted in the shade Ukkonen (3436) from Tikkurila’s translucent interior paint range, a slightly bluish dark gray.
The treatment was done in two stages. First, I treated the boards shortly after picking them up from the sawmill, coating them once all over. With the help of a volunteer assistant, I oiled the usable side and the tongue profile using the calculated consumption amount plus 15%. The tongue, meaning the interlocking groove and profile that fits into the next floorboard, is worth treating because water will certainly end up there too, even though it can no longer be painted after installation.
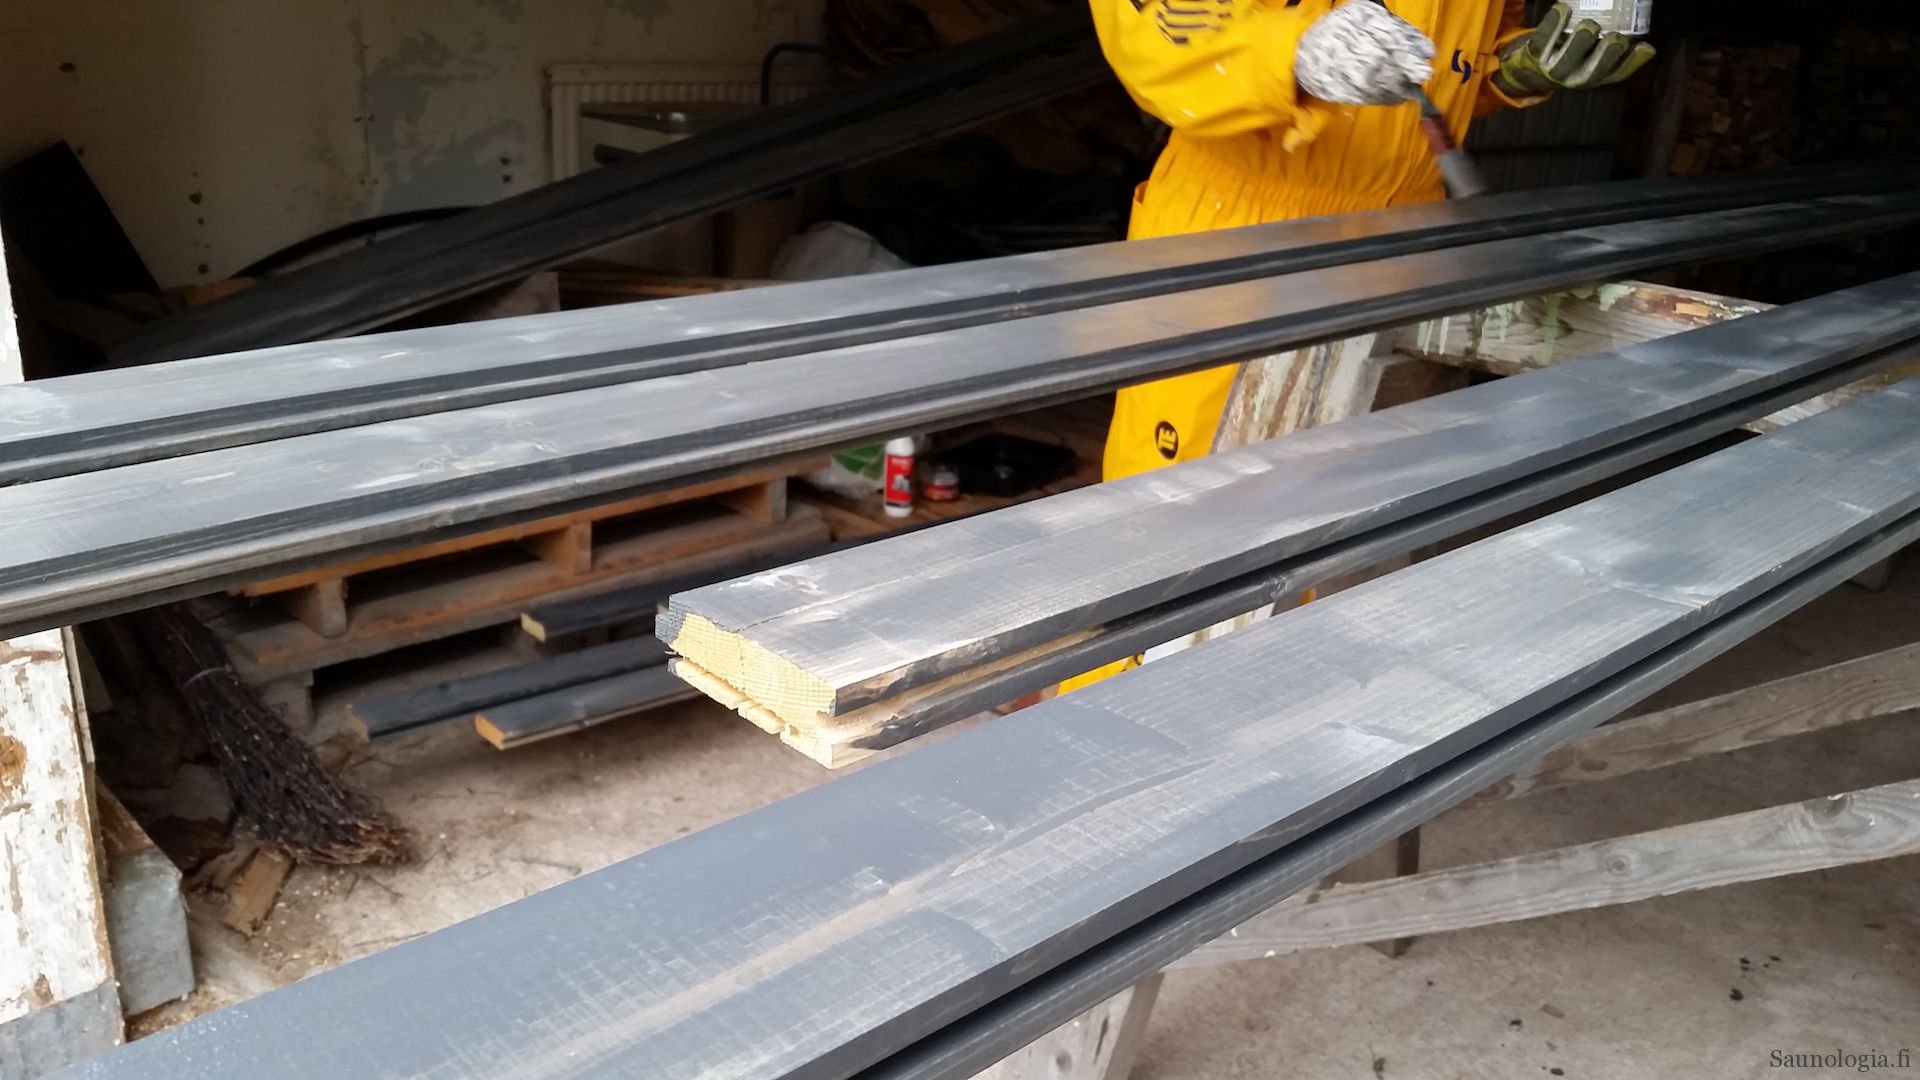
Almost any brush slightly narrower than the board works well enough for applying the oil. I used a synthetic-bristle one. In the end, I cleaned the brushes with Tikkurila’s brush cleaner, a rather unusual biodegradable cleaning agent. For someone used to turpentine, it worked surprisingly well without a strong characteristic odor.
The second treatment took place once the floorboarding was complete and the major work in the sauna room had been finished, meaning that no major damage to the floor was expected anymore. The minimum application temperature for the floor oil is 5°C (41°F), with humidity below 80%. In October of that year, we were already quite close to those limits, although for the season it was pleasantly dry at 70 to 80%.
Agent in practice
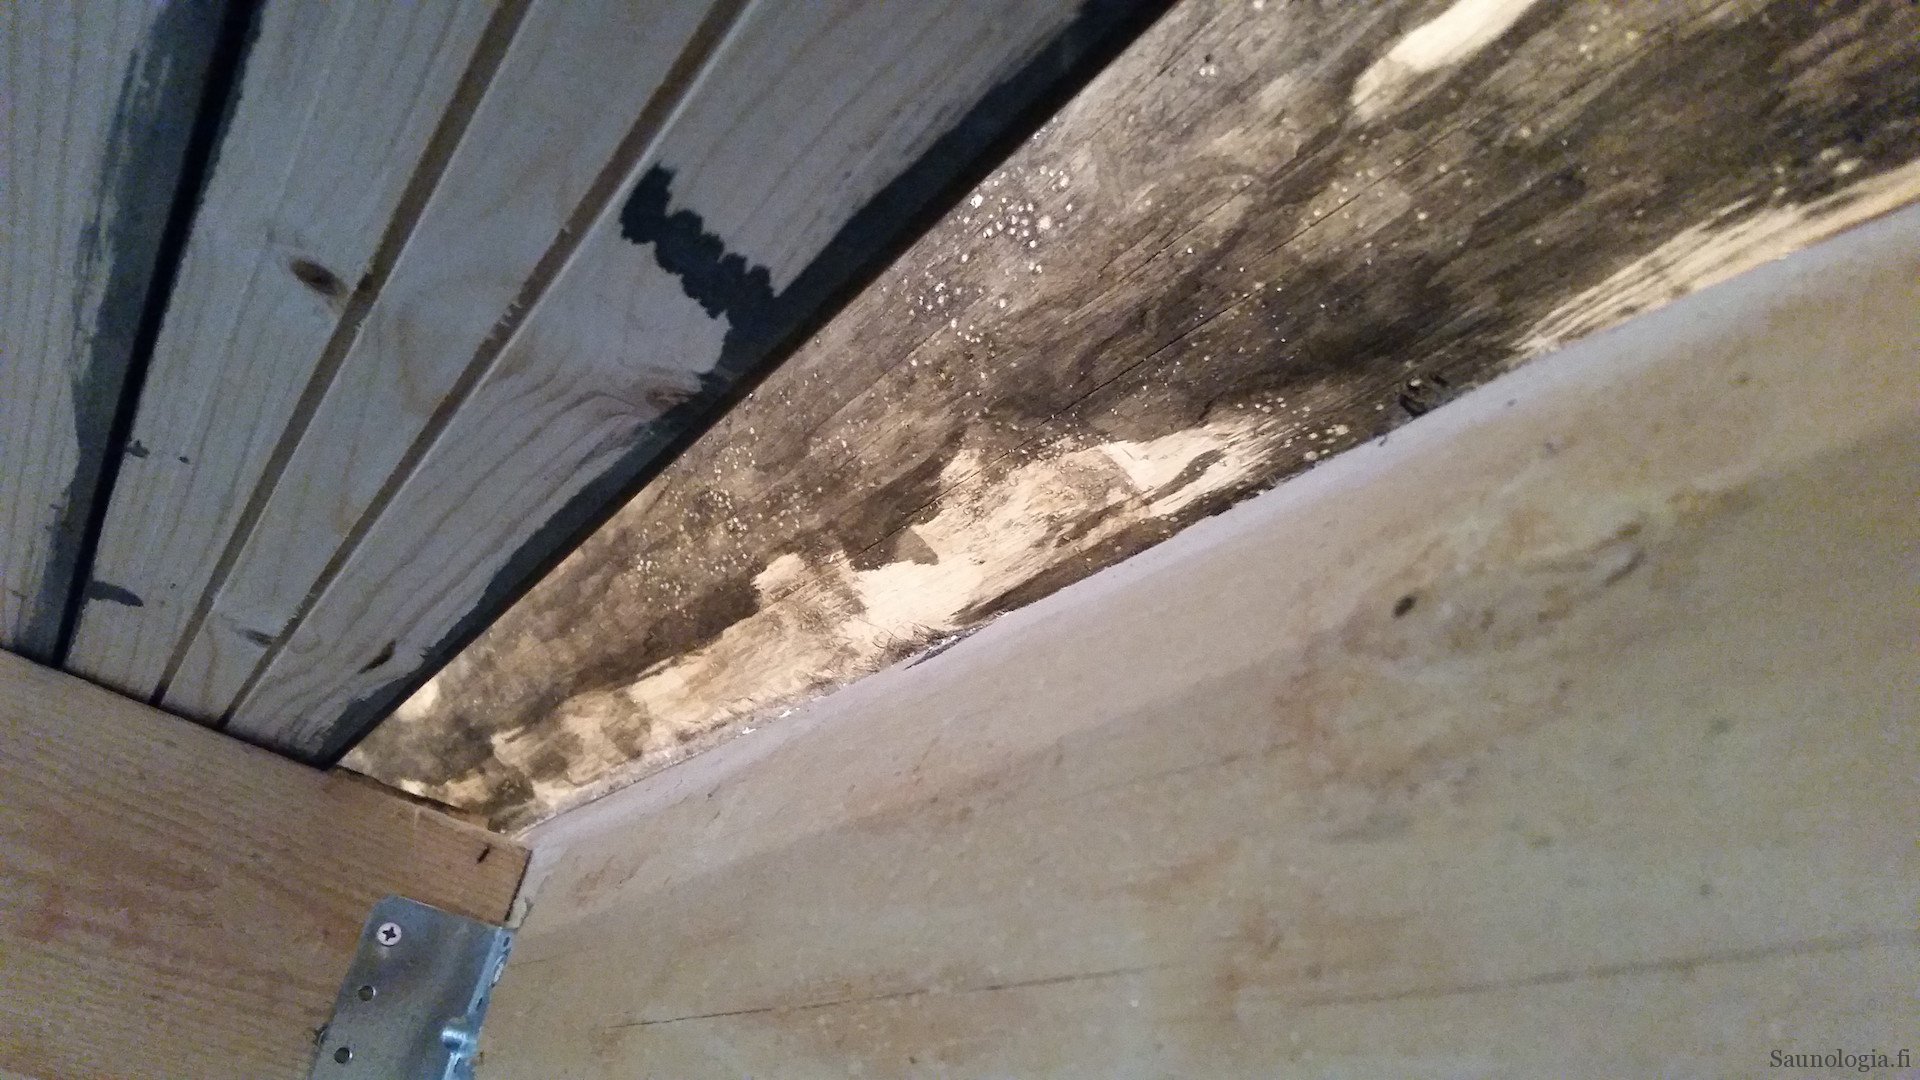
Despite the relatively low relative humidity, the floorboards had clearly absorbed moisture from the air and the tongue joints had swollen. For this reason I did not start sanding the floor at that stage, because leveling it would probably not have produced the desired result. Sanding and retreatment may become relevant in a couple of years during a dry season. The dressing room floor had not yet been built at the time of writing, and my intention was to let the boards for that floor dry slowly in the cottage’s background heat before installation, in order to reduce later cracking.
As I’m reflecting on what I wrote nine year ago, I can say that the floor solution has been very durable. I did apply a third layer of coating in the area that saw most foot traffic and where the upturned sides of the plank had worn off slightly. I only cleaned the existing layer, but didn’t sand it.
That was not a good idea. The earlier surface was still so smooth and non-porous that the new layer did not really stick and the outcome doesn’t look too nice. The only good way to re-apply would be to sand it thoroughly.
Wooden sauna floor and drainage
In our sauna cabing, it is intended to be possible to wash up to a reasonable extent. Water is also naturally used for throwing löyly. Unfortunately, water is not a friend of a wooden floor. The typical concrete floor in wet rooms is built with a proper slope cast into it, so that it inclines toward the drain. The recommended slope is at least 2%. Water movement also depends on the surface structure: the rougher the concrete or tile, the less readily water flows.
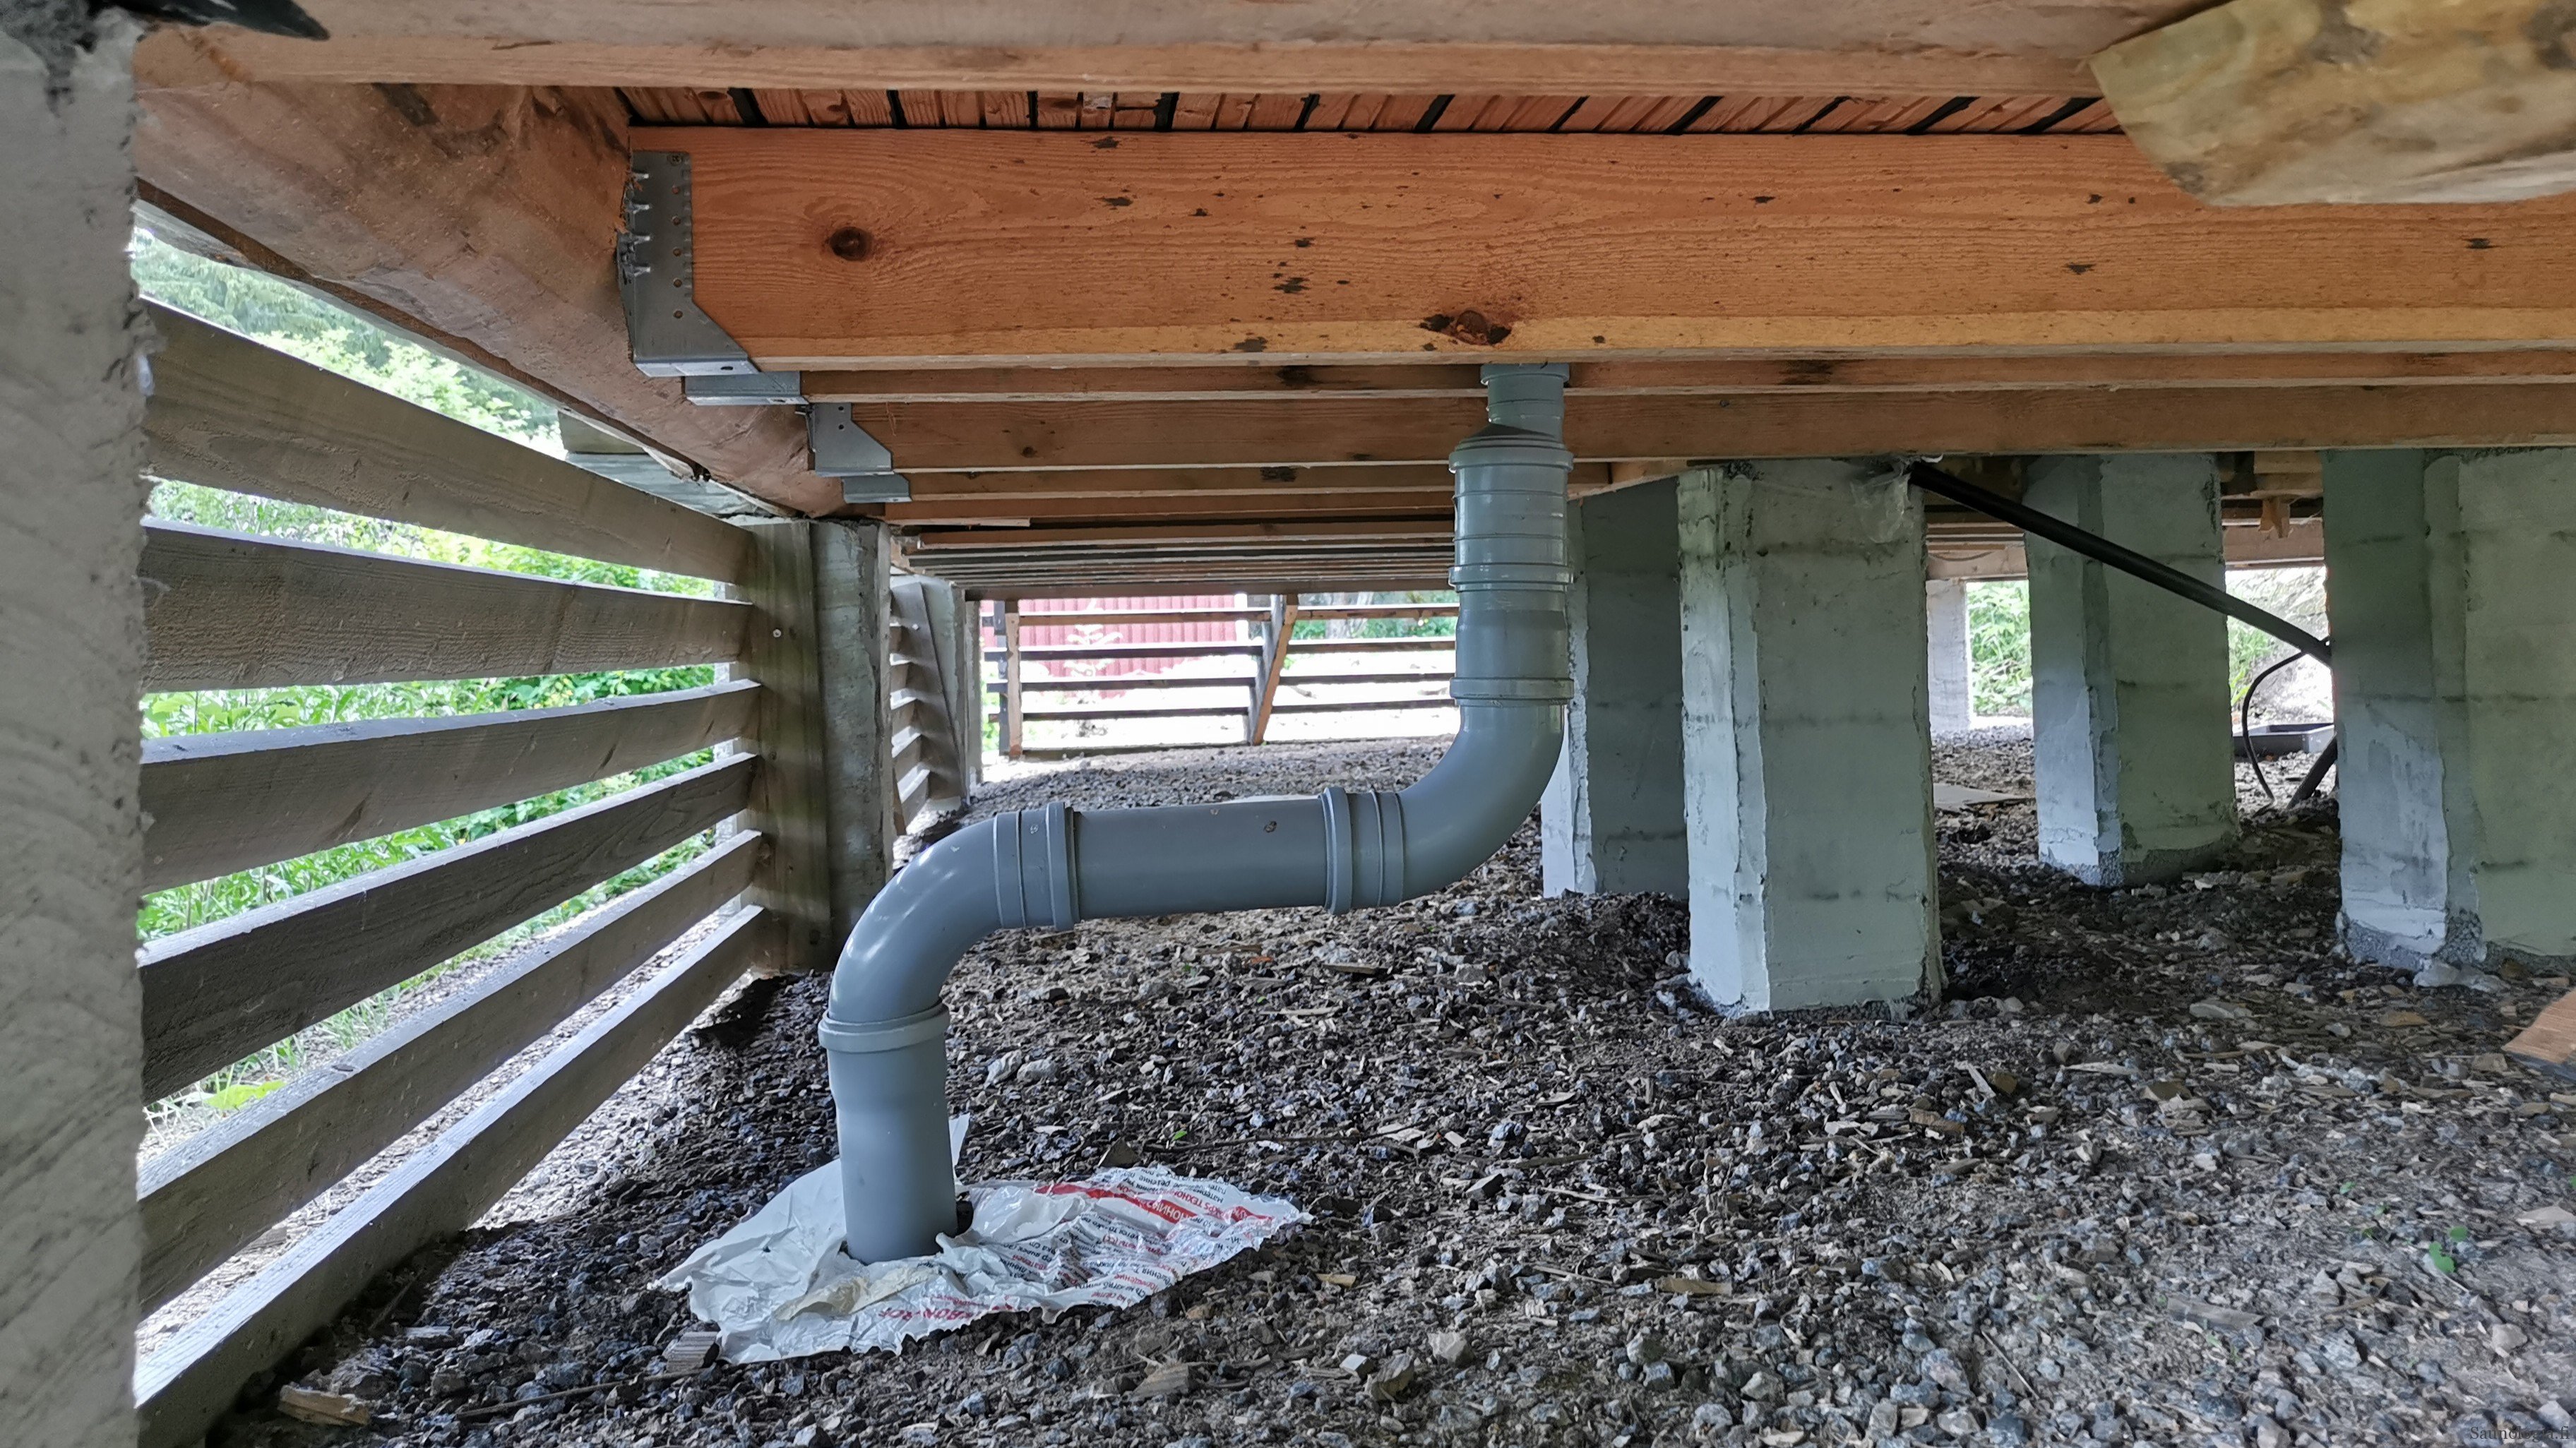
A slope can also be created in a wooden floor by means of the supporting joists. The most important question, however, is where the water is directed on the floor. In principle, a conventional floor drain familiar from concrete floors can also be installed in a wooden floor, but a simpler option is a prefabricated drainage channel (a linear drain variant). These can even be made of wood, but there is also an aluminum telescopic channel available for sale that is sufficient for a sauna floor up to 2.5 m (8.2 ft) wide. The product I used is no longer sold individually, but a similar products are available in Finland (https://www.puuilo.fi/warma-pihasaunan-lattiakouru-90mm-1-6-3-4m? and https://www.sarokas.fi/saunan-vesikouru-pro)
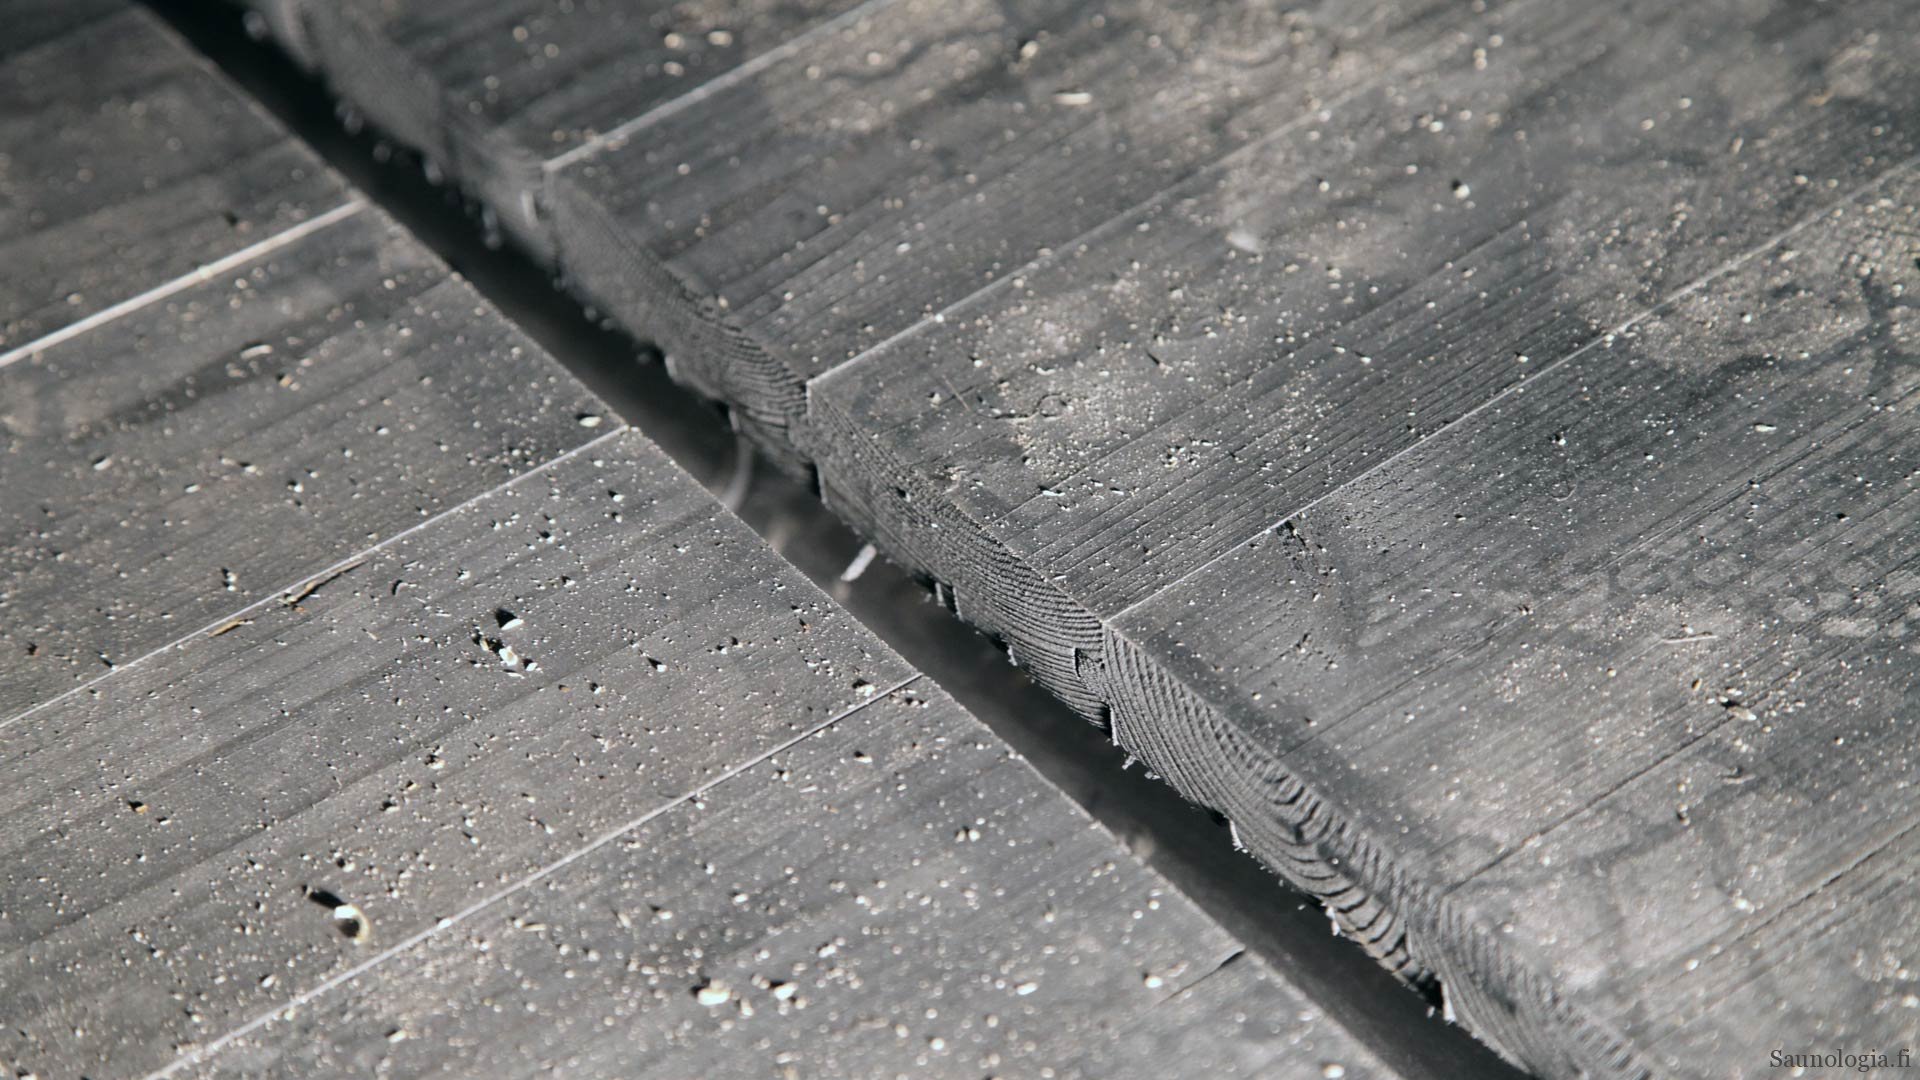
I ended up choosing such a solution. It allows wash water to be collected into a single 50 mm (2 in) drain outlet, much like a floor drain. In addition to the slope, the floor needs a 15 to 50 mm (0.6 to 2.0 in) gap at the location of the drain so that water can run into it.
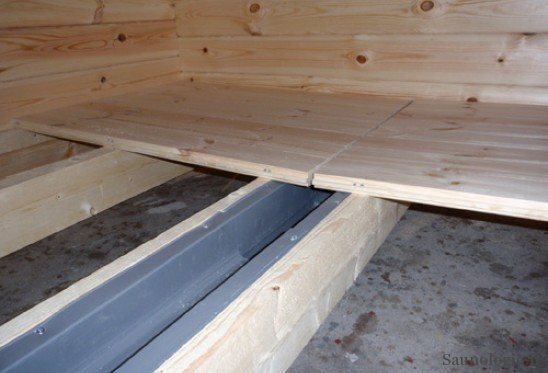
I made my own floor drain 30 mm (1.2 in) wide on the top so that it can be cleaned when necessary with fingers, a dish brush, or a vacuum cleaner’s narrow nozzle. As in the manufacturer’s example image, it is worth laying the boards so that they run toward the draing, in which case any water that enters the tongue joints will at least in theory also drain into the channel. I placed the channel closer to the side of the benches rather than in the middle of the room, so that no one could step into it by accident.
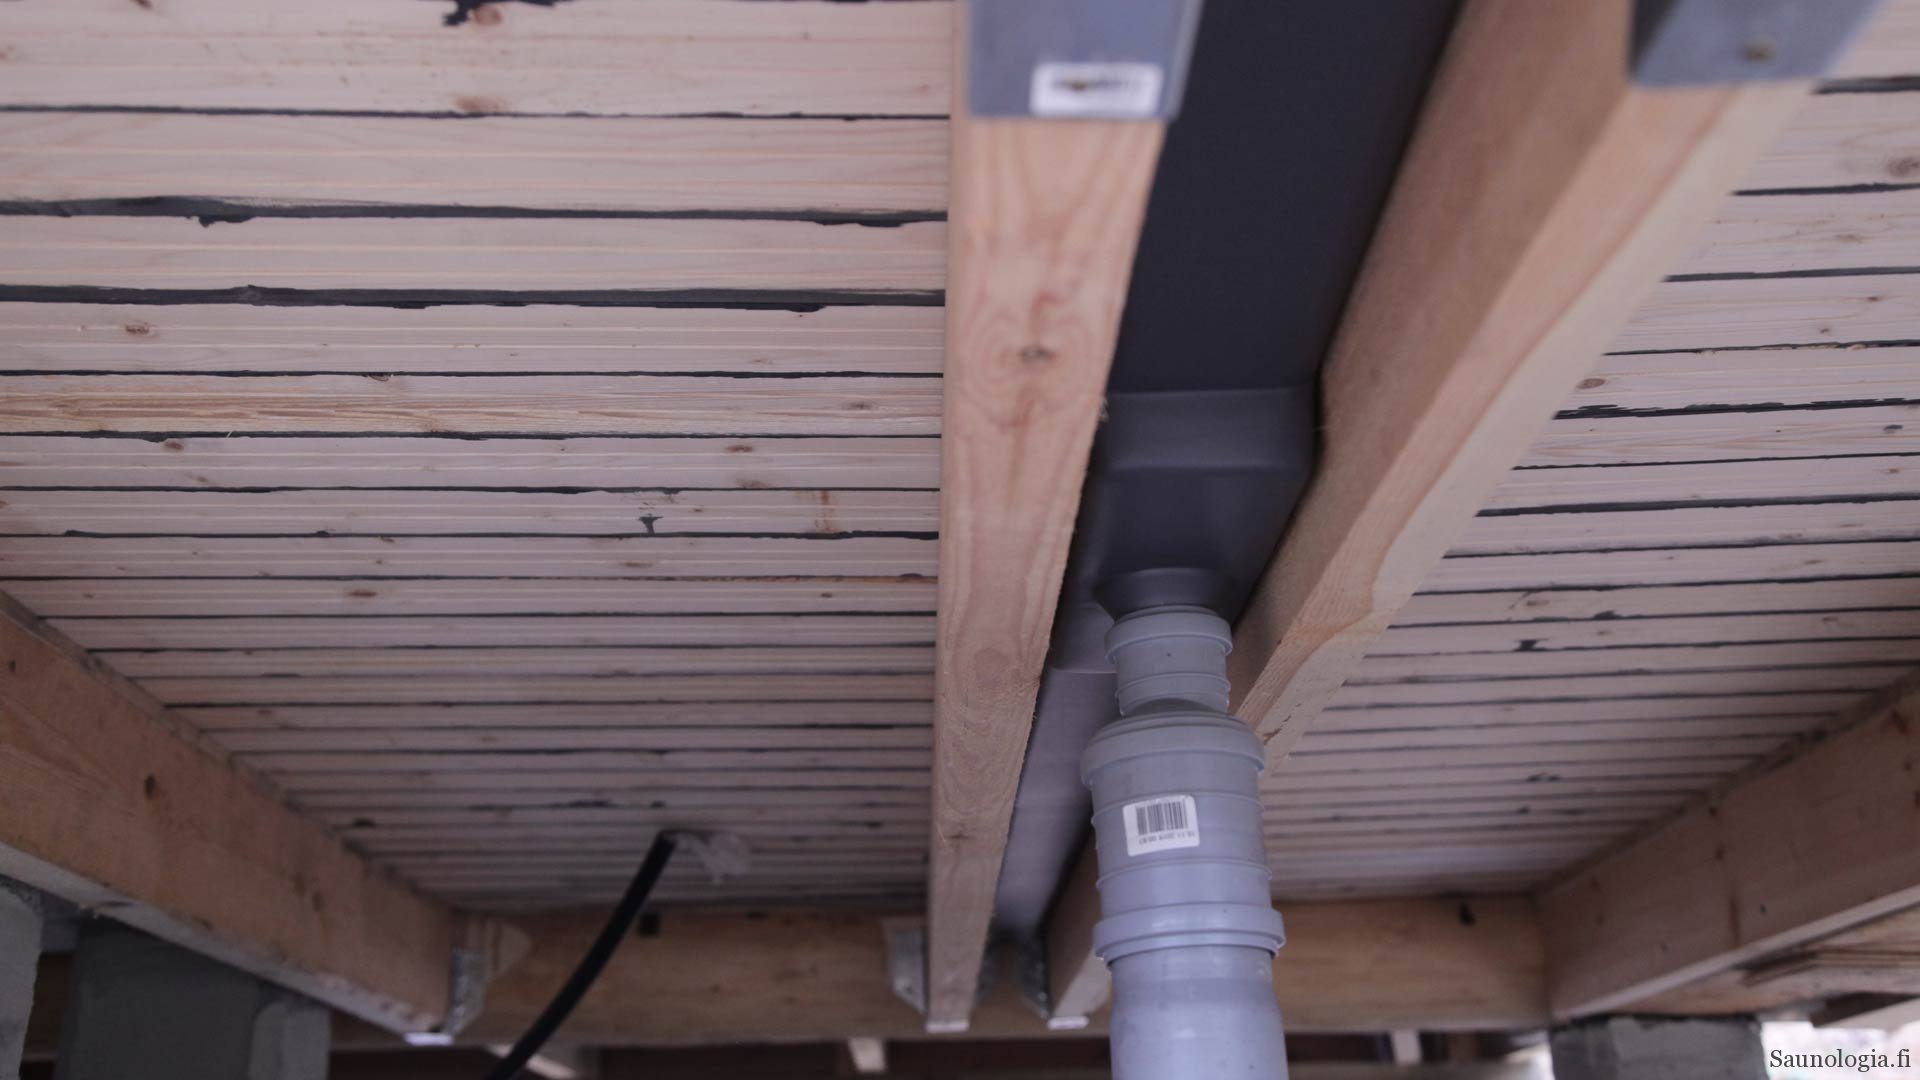
It is worth noting that a factory-made floor draing forms one continuous and fairly tight structure. So the floor does not actually have a hole in it. Instead, the drain installed between the floor supports tightly covers the opening. The channel’s only hole is the drain connection, through which, for example, air does not significantly pass in either direction.
I intentionally left out the drain trap (water trap) just to have less parts to maintain and protect from freezing. I have for years thought about adding one, but the motivation has been lacking. However, if you don’t have to worry about freezing, definitely put it in!
My floor did not involve any other unusual structures. The floor was not insulated from below. This was because the builder questioned how such a solution would behave with moisture. Water ending up on top of insulation through the gaps between the floorboards might remain there too long, dampening both the floor supports and the boards. The principle of my floor now is instead to allow water to leak under the sauna in a controlled way along the walls and around the edge of the heater base (read about heater foundations), so that any runoff can dry naturally. If the sauna is used in winter, you can always place an old rug on the floor.
The floor and löyly: the floor as part of ventilation
Finally, in an outdoor sauna with a crawl-space foundation, one more issue related to the floor is its role in ventilation. One classic sauna ventilation solution is the slatted floor, which brings fresh air into the sauna. A continuously heated stove can also receive combustion air in this way.
From the point of view of physics, ventilation introduced from below does not sound like a very good idea. Sauna air stratifies, with heat and moisture accumulating at the upper level, as explained in the article on natural ventilation.
Air can, however, be moved in two ways. The first is a continuously heated stove that is fired from inside the sauna. The airflow created by heating and combustion in the stove always mixes the air to some extent.
The second option is vigorous löyly use. Throwing löyly causes a temporary strong overpressure in the sauna, which pushes air outward from the sauna room (a piston effect). Air escapes wherever it can most easily, and if that place is at floor level, that works too. When the löyly settles, negative pressure is created, drawing air back into the sauna.
There are, however, some problems with a slatted floor. Collecting löyly water and wash water from a slatted floor in accordance with current wastewater regulations is difficult. If the building has a pressurized water supply, it may even be impossible. The municipal building authority may prohibit such a solution altogether.
I have previously referred to Juha Telkkinen’s well-documented smoke sauna, which has a slatted board floor. Juha had arranged wastewater collection beneath the slatted floor so that under the sauna there is a soil layer shaped to slope, covered with thick plastic sheeting (pond liner) that directs dirty water into a collecting drain. Stones placed on top of the plastic hold it in place.
In the opinion of some, such a solution may involve hygiene problems and odor issues, but according to Juha, no such problems have occurred. For the practical functioning of a slatted floor, it is important that the gaps do not become too large even during the driest season, so that even the smallest toes do not get caught between the boards. The 12 mm (0.47 in) upper limit used in deck boarding is probably a good rule here as well.

As noted, a slatted floor was ultimately not built in my own sauna after discussions with building control. As a compromise, I chose the same solution also used in Salvos sauna cabins, where the floorboarding is left open by 3 to 15 mm (0.12 to 0.6 in) along the wall.
Another ventilation solution used, for example, in smoke saunas built directly on the ground is the so-called floor vent, usually built in pairs on opposite walls. This allows them to be adjusted according to wind direction and temperature. My own sauna does not yet have such an opening. The plan, however, is to enlarge the openings in the floor if needed by removing a section of floorboarding from one edge where it has not been nailed down. Because there are no tested recommendations for this ventilation solution, it will be necessary to proceed by experimentation once the sauna is otherwise fully operational.
Time will tell whether this is sufficient – so far I’ve been happy. In the summer I open up the boards, in winter, I keep them closed. Still, winter ventilation is better.
Post scriptum: does this floor work in cold weather?
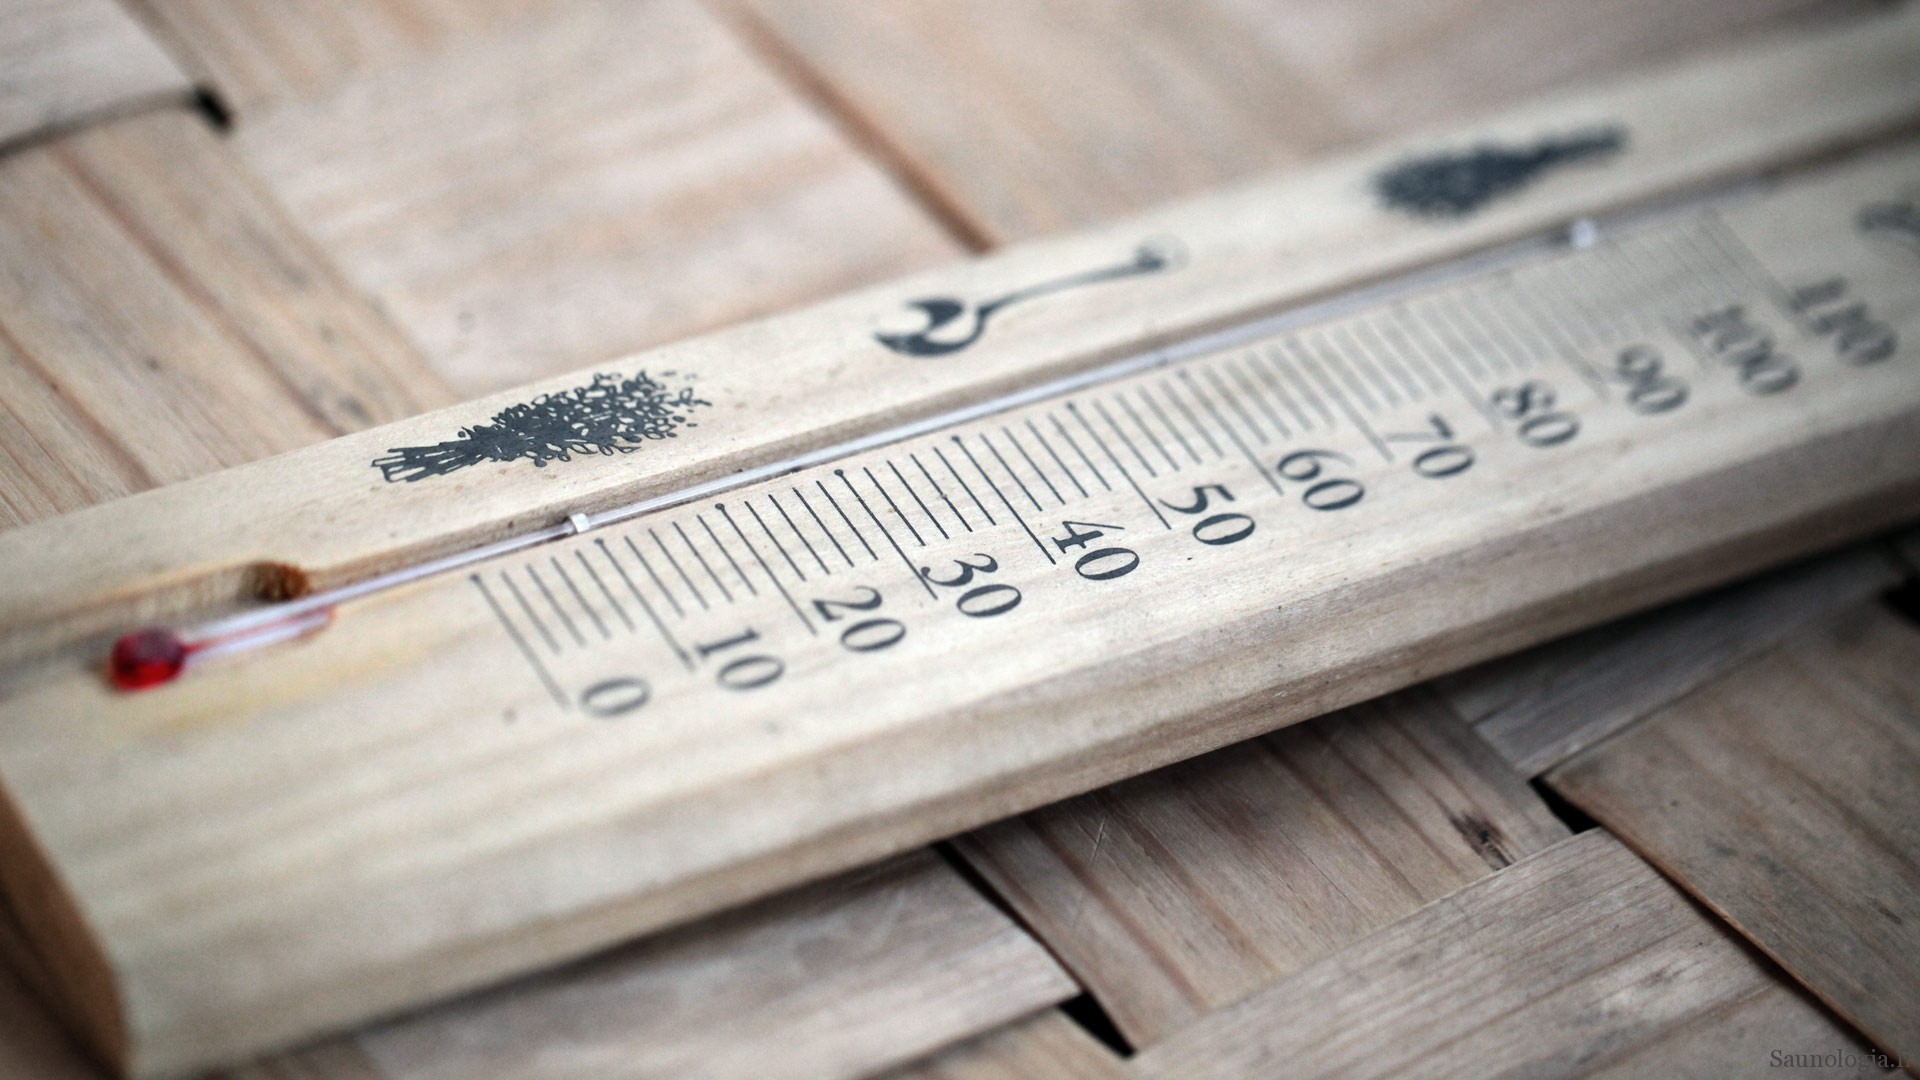
Theoretically sensible floor solution got its first real practical test when the sauna was heated for the first time at the end of November in windy and damp outdoor weather of +4°C (39°F). When the thermometer had reached 65°C (149°F), the floor surface temperature was 25°C (77°F). At the same time, the same surface that read 65 degrees at the upper level read 55°C (131°F) lower down, so the temperature difference was only 30 degrees across a height difference of 2.5 m (8.2 ft). In other words, warm air circulated well and the sauna ventilation worked as expected. The floor also felt warm.
An insulated floor would heat faster and stay warm longer, but here the simplicity won.
Everything in order!
This article is a fresh translation of one of the most loved Finnish Saunologia posts of all time!
About Us
Saunologia is the provider of premium Finnish sauna design services for clients worldwide through FinnishSaunaDesign.fi. Led by Dr. Lassi A. Liikkanen, our work combines authentic Finnish sauna expertise, modern design thinking, and technical know-how to create exceptional sauna experiences for homes, hospitality projects, and wellness destinations. From concept design to expert guidance, we help bring world-class sauna ideas to life with credibility rooted in Finland.
Learn more at FinnishSaunaDesign.fi


That link for the aluminum drain doesn’t work any more
Correct, my mistake of not updating the link. There are now two example links, https://www.sarokas.fi/saunan-vesikouru-pro looks like the one I was using.