Finnish Sauna Essentials Part 6 – Interior design
In this final part of the Finnish Sauna Essentials I will cover the remaining bits of the Finnish sauna. The interior design of a sauna involves much more than making sure that the sauna looks pretty. There are several elements to specify and questions about possible materials to answer. In this article, the focus is on the structures that you can see and feel in the sauna: ceiling, benches, walls, windows, floor, lighting, and the door.
Sauna interior design and the magic of the materials
At a glance, sauna room has most of the usual elements of any room, plus the stove and the benches that scale up the wall. But if I prioritize these structures based on their importance for good sauna and löyly experiences, the list will start with the benches and the ceiling, followed by the walls and the floor, windows and lighting, safety measures, and ends at the door. None of these is totally insignificant, but the biggest damage is done if the first ones are neglected.
Matters such as insulation and vapor barriers are excluded from the present story, but I must point out that keeping the warmth and löyly inside the sauna, and out of the wrong places, strongly motives their consideration in sauna construction. But they are not interior design questions specific to sauna, instead they apply to all wet or warm rooms.
I will begin from the top of room, and ask what’s a good ceiling for a sauna?
Ceiling and benches – a matched pair
Ceiling is a really critical structure in a sauna, even though few notice it all. Sauna benches on the other hand are the most visible structure of most Finnish saunas. They serve to raise the sauna bathers to a level where intense heat and löyly can be enjoyed.
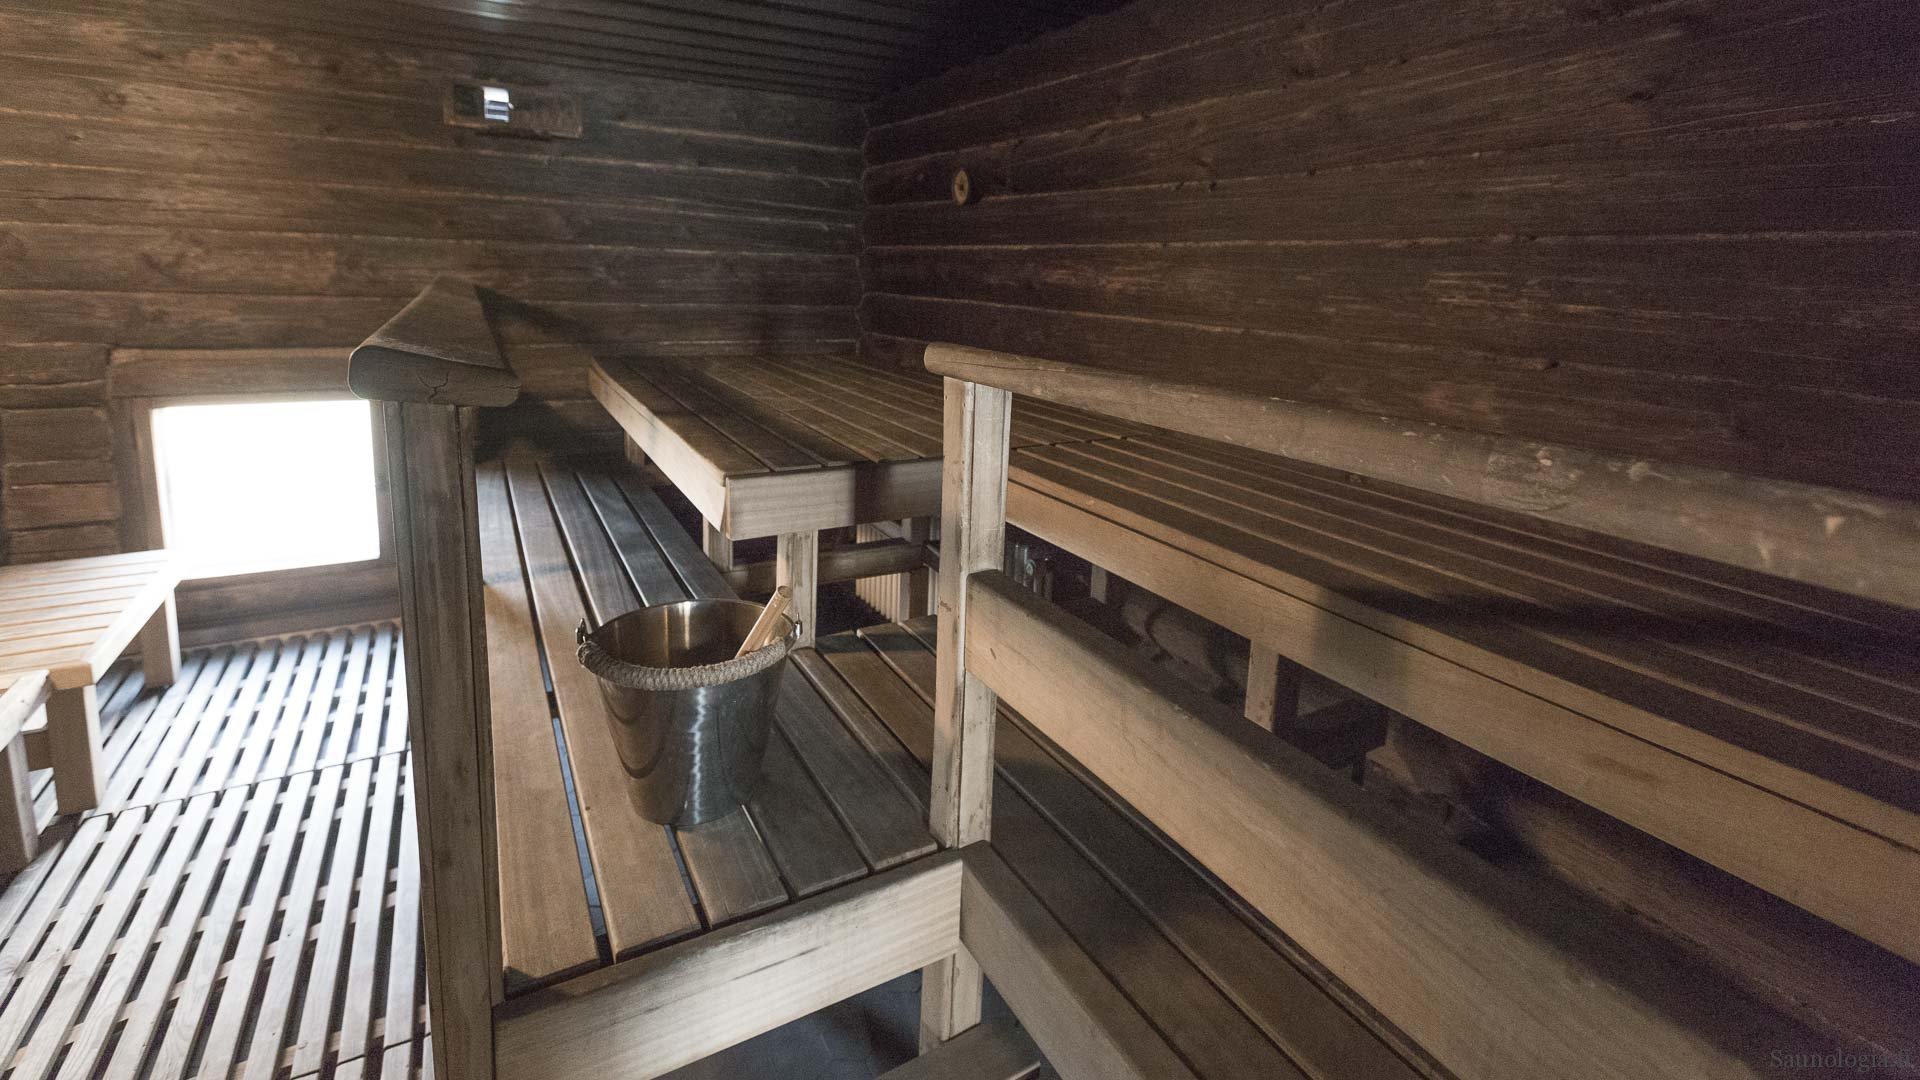
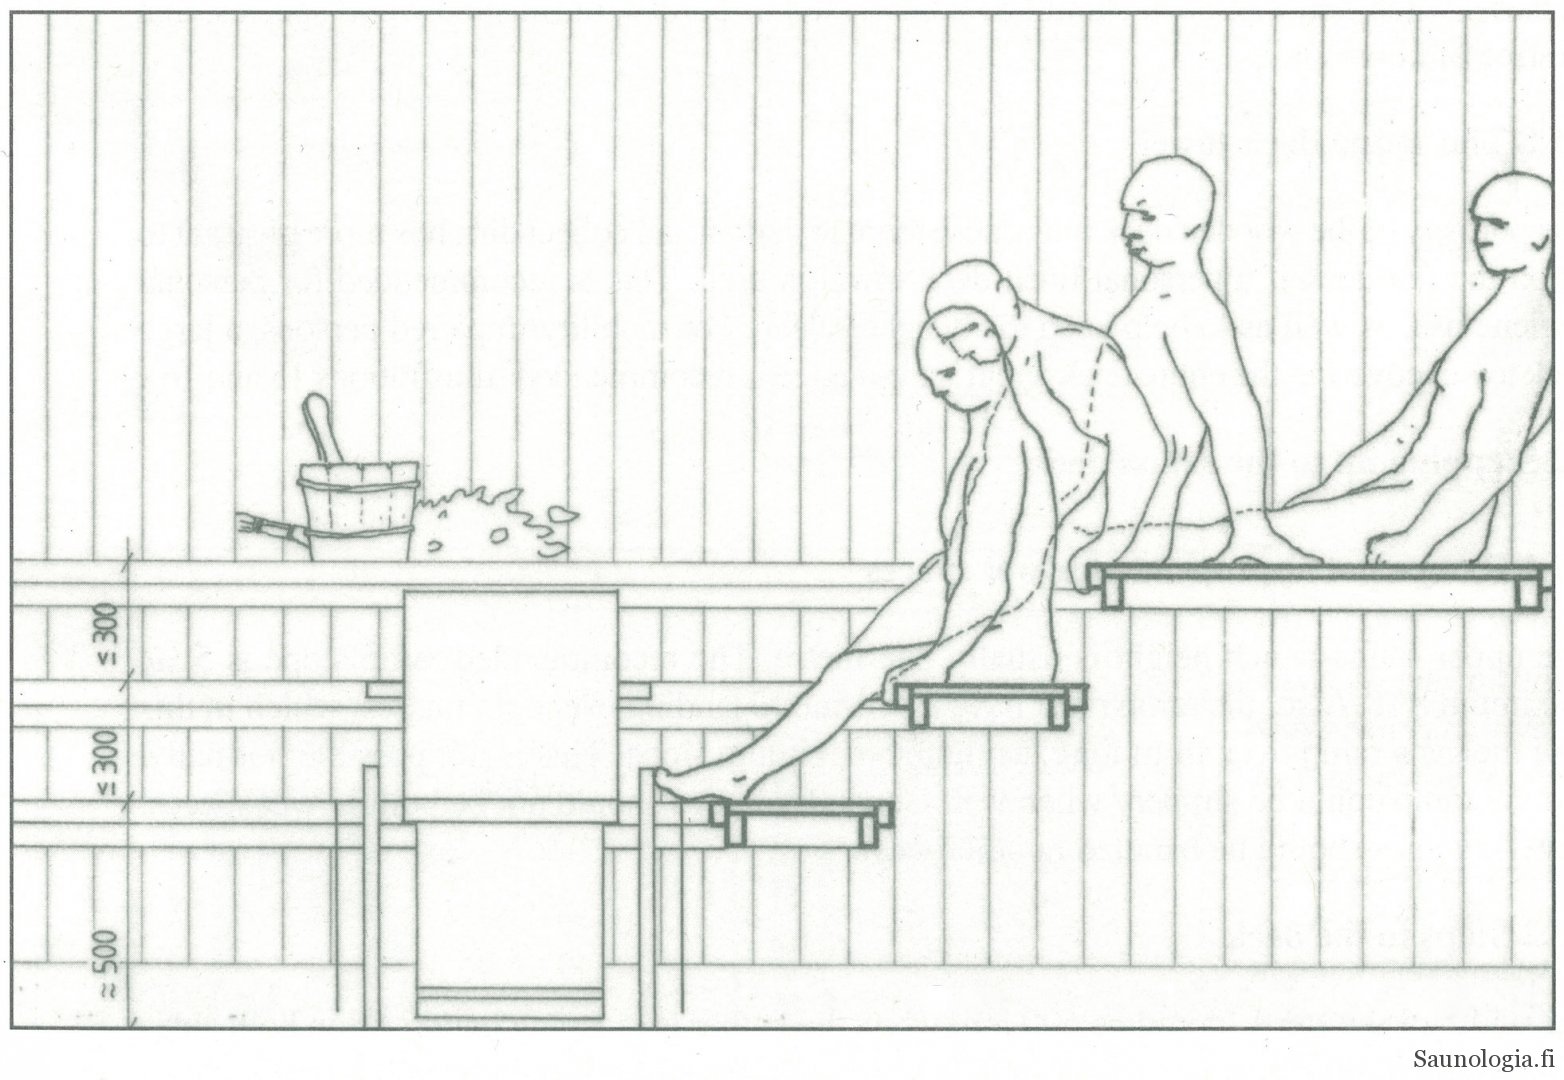
The basic design principle is thus simple. The top bench should remain within 120 cm of the highest point of the ceiling (please see the table of unit translations at the bottom of the page). An acceptable range is from 100 to 120 cm. In public saunas, 110-120 is common. If a private sauna is designed for short people, 100 is okay. The so called foot bench is 45 cm below the top bench (typical seat height). That level is usually still so high in the room that you will need more steps (climb riser range from 20 to 40 cm per step) to help people reach the feet bench level. The degree of going (depth) depends on the rise.
There’s one more thing about the benches. According to the so called law of löyly, you should raise the foot bench higher than the top of the sauna stove. I recommend going even 10 or 20 cm higher to guarantee your whole body will enjoy even warmth and embrace of löyly.
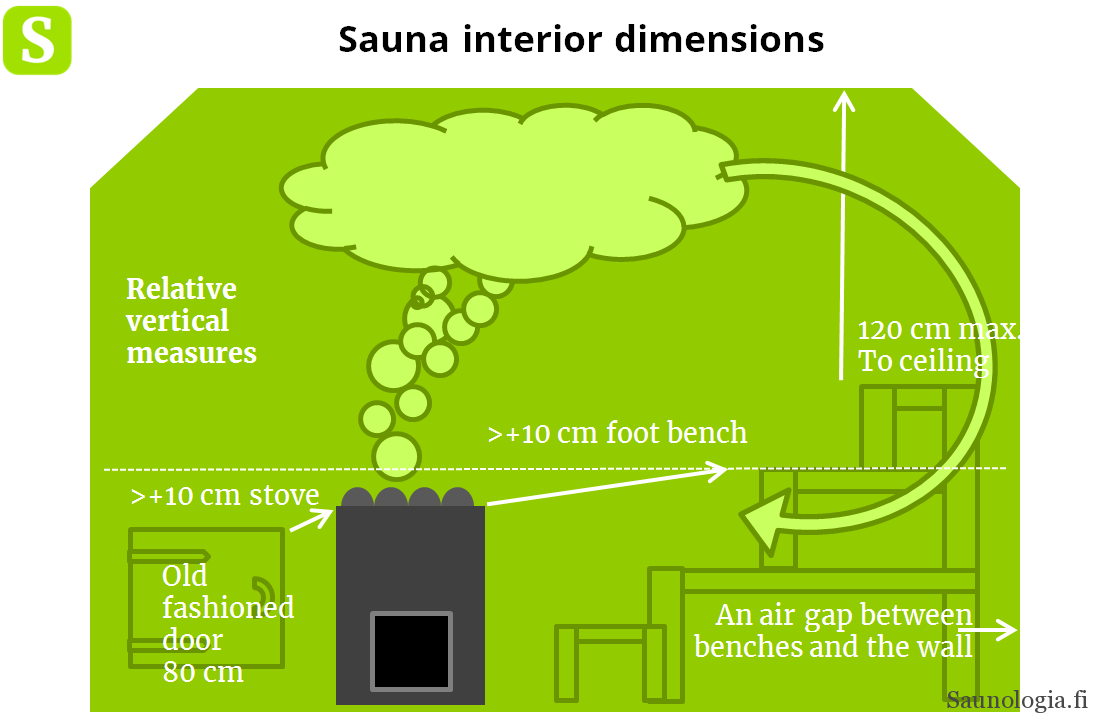
There are few other dimensions to take into consideration. The depth of the seat (top bench) should be at minimum 60 cm, but can expand to 100 cm to allow keeping ones’ feet on the bench as well. Each sauna bathers should receive some 60 cm space horizontally to feel spacious. If you’d like to lay down on your back, then you should model the dimensions as a bed (190 x 60 cm or similar at minimum).
As we’ve now specified the benches based on where the ceiling might be, let’s touch that topic as well. The ideal shape for the sauna ceiling would be a dome that allows löyly travel quickly and freely around the room. Even a flat ceiling is okay, but do avoid uneven ceilings that might trap löyly (and heat) where the sauna bathers can’t feel it (see picture).
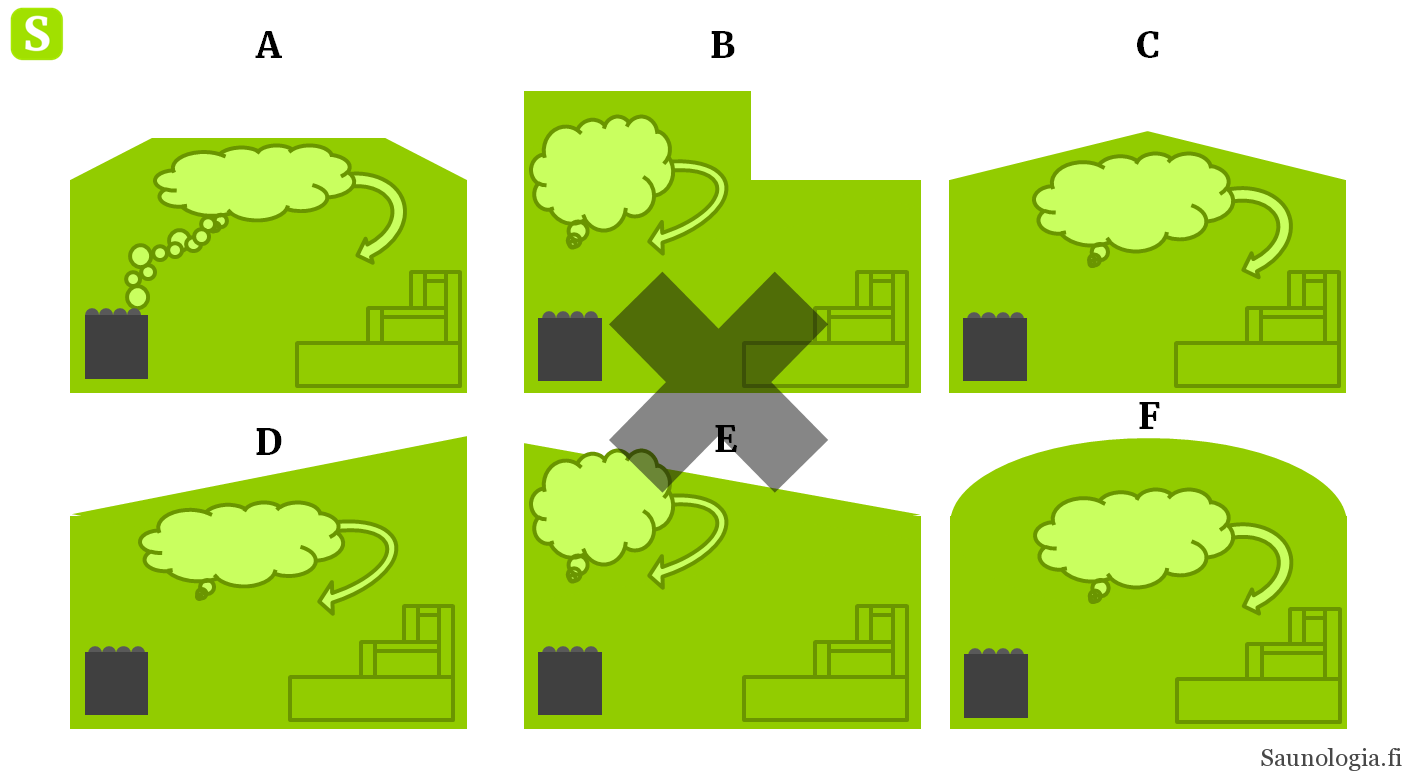
The other crucial thing about the ceiling is that it must not leak heat, humidity (unintentionally), or drip with sap. The ceiling is the one surface which should always be insulated, no matter how low budget sauna you’re building. Or if you can afford to waste firewood, then do as you will…
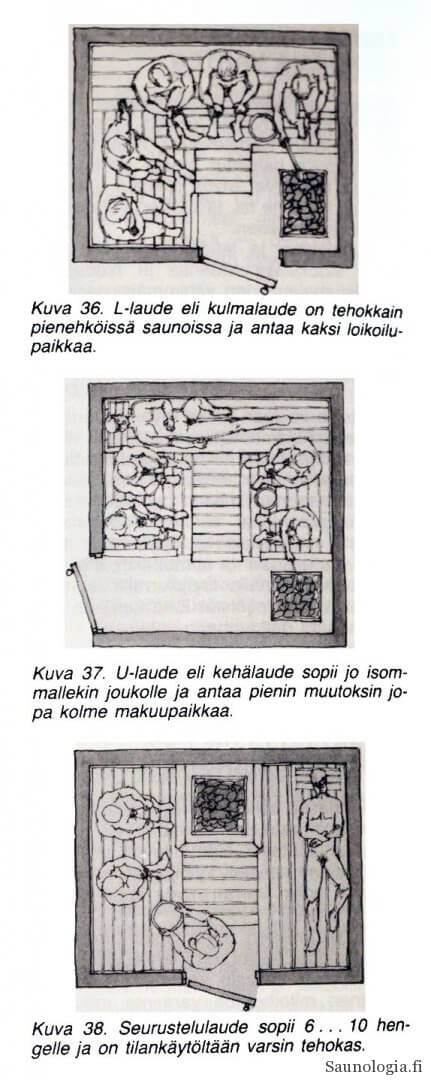
Let’s stop at the benches one final item. Overall bench configuration is another thing to consider. By this I refer to how many people you can seat (or have on their back) in the sauna room. There are several options available. The most simple one is the “back wall bench” in which the benches rise opposite to the entrance. But you can create shapes such U or L (looking from the bird perspective) to meet the possibilities of space as needed.
Benches should be made out of material suitable for sitting naked while they are hot. Spruce and aspen have been used in Finland traditionally due to their good availability. Spruce should have no knots as they may leak sap, which is very much unwelcome. Aspen is thus the best, also being lighter in weight and looks. Unfortunately it also sensitive to deteriorate quickly in terms of looks.
I believe most wooden materials are fine for sauna benches, although the ones indicated by dealers as intended for sauna use are the best. For instance, redwood or eucalyptus are not suitable.
Pinterest board with various fashionable bench designs, largely outside Finland.
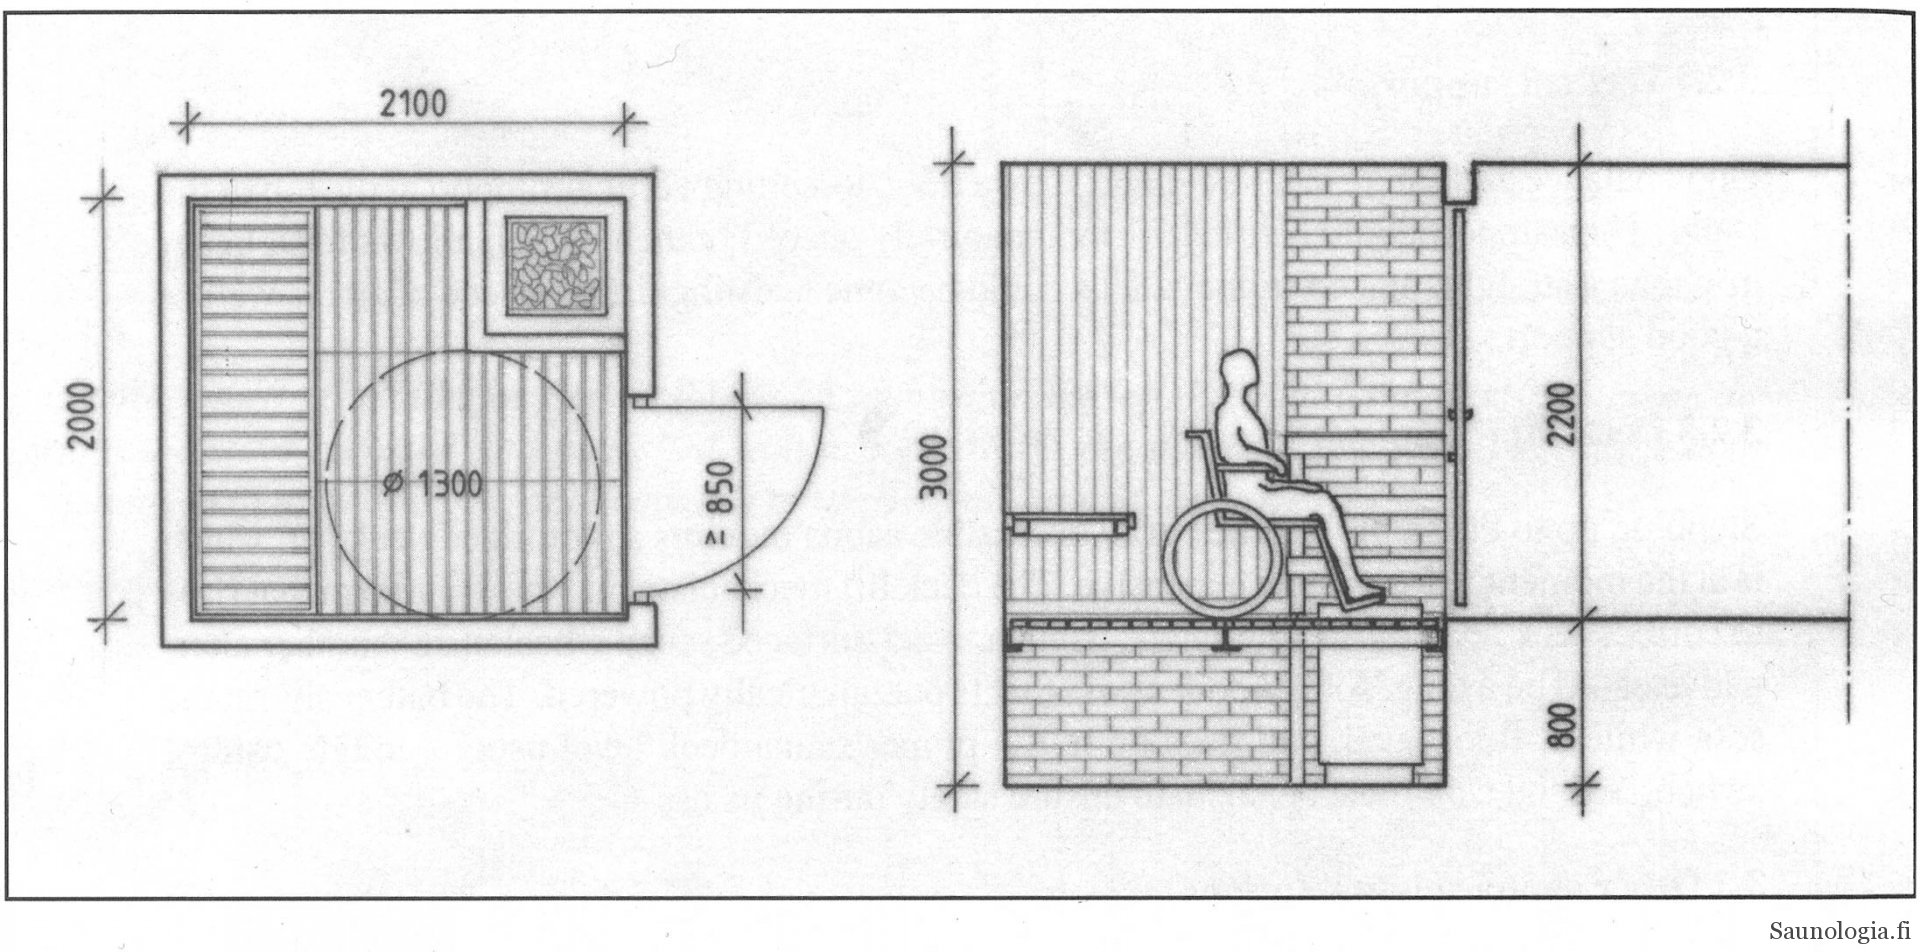
Finally, benches can be designed to accommodate people with disabilities. Accessibility requirements in Finland dictate that a person in a wheel chair should be able to turn around in a sauna, but that’s meaningless unless they can also enjoy löyly. Enabling löyly for the disabled is a topic of its own.
Walls and finishing
Walls are needed.
Like the ceiling, walls help to keep the heat inside. They should be pretty airtight at least in the level above the stove. I recommend solving your ventilation needs otherwise than having leaking walls.
Walls are much more aesthetic than a functional part of the sauna room. Their material is usually wood (wooden panels or solid wood) in the Finnish sauna. Wood has many desirable qualities, especially hygroscopic properties that allow it to absorb humidity and release heat.
Ceramic tiles and other fire resistant materials can also be used at least to cover surfaces exposed to the most intense heat radiation of the sauna stove and flue. Glass surfaces are nowadays common in Finnish apartment saunas. They add a great feeling of space and improve lighting but are a problem when it comes to insulation as they give away heat energy to adjacent rooms.
Wooden materials can be left untreated. Untreated wood enables the hygroscopic function. This effectively buffers löyly. If you desire very hard löyly you can either treat the wooden surfaces or use ceramic tiles to cover the whole room. There is no real need to treat the surfaces if they are not in touch with any body (I do refer to human bodies that emit fat and bacteria). Treatments do not fight natural aging that eventually calls for a remake of the sauna paneling. I also suggest leaving the wooden panels of the dressing room untreated.
Check out my inspirational collection sauna walls images – mostly from outside Finland with much stone!
Treating wooden sauna walls (and wooden benches) enables to you achieve almost any color scheme in a sauna and may facilitate keeping it looking fresh and clean. Although that is possible, I generally advise against it. In Finland, several surface treatment agents or “paints” for sauna are available. They are designed to withstand high temperatures and humidity, but people also have bad experiences of their application so I am not their biggest fan.
Floor
Good sauna floor is safe, not slippery or pitch black. Once more wood is a great material for flooring a sauna. However, because sauna floor does not usually heat up as the ceiling or wall surfaces do, or interact with löyly, there are more options for treating the floor without the negative side effects. In fact, untreated wooden floor requires excellent air ventilation and decent slope (fall; 1-2%) towards the waste so the floor dries out quickly. As implied, the floor needs a drain (waste). The detailed arrangement is totally up to a type of sauna we’re dealing with, but sauna is a wet area and thus requires a way to expunge water.
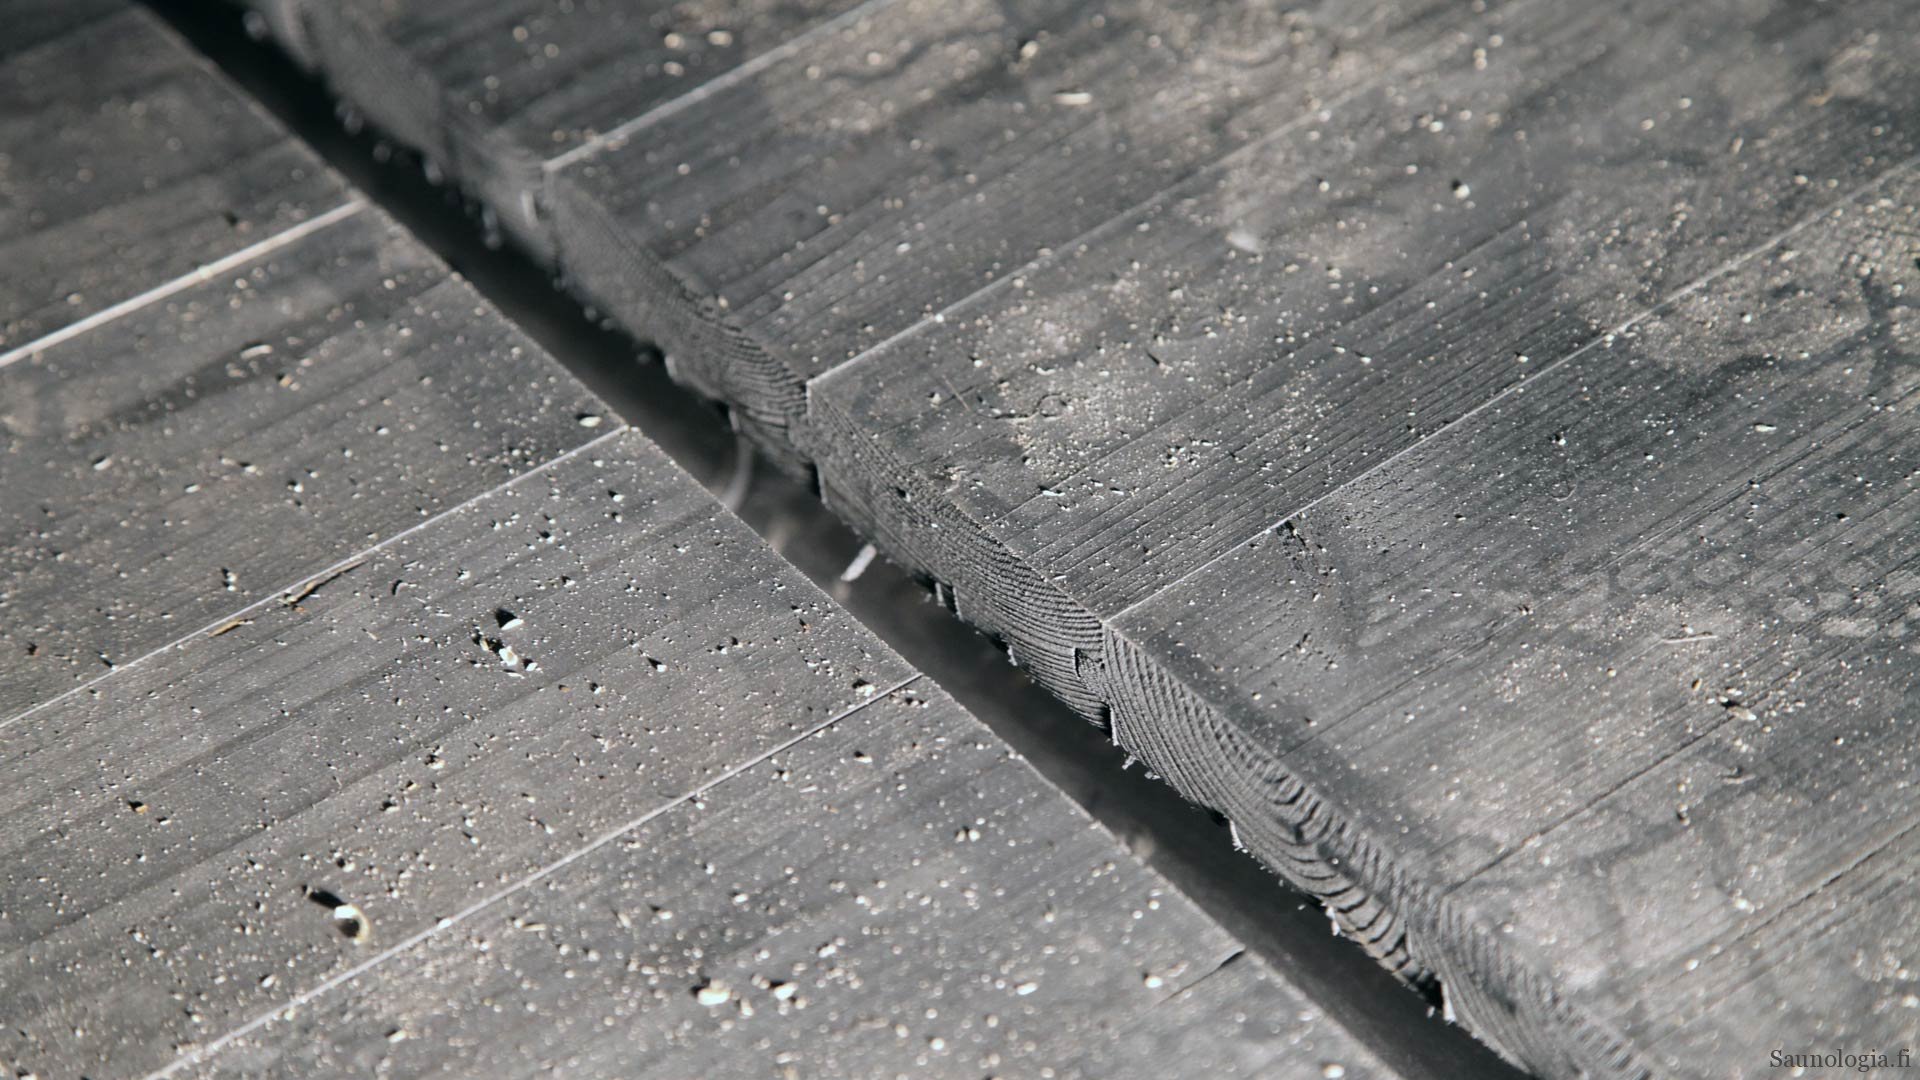
Sauna floor can also be made out of concrete and covered with ceramic tiles. For sauna cabins, be aware that a cold concrete floor is undesirable. Electric heating integrated in the floor can greatly increase comfort and helps to dry out the floor after use. Unfortunately due to the way sauna behaves, a cold concrete floor does not easily or quickly heat up, but takes a long time. If the sauna is in constant use, then it’s a non-issue.
Windows, lighting and safety
Natural light is an integral part of the Finnish sauna tradition. Small windows close to floor level have provided light since the time of the modest smoke saunas. In consequence, the traditional feel of saunas used to be dim, and that’s still acceptable as it helps to calm you down and achieve a peaceful sauna state of mind.
Some amount of light is anyhow recommended just for safety reasons. Ascending and descending sauna steps is difficult with poor light, particularly if you are shortsighted and should be wearing eyeglasses, which is cumbersome in a sauna.
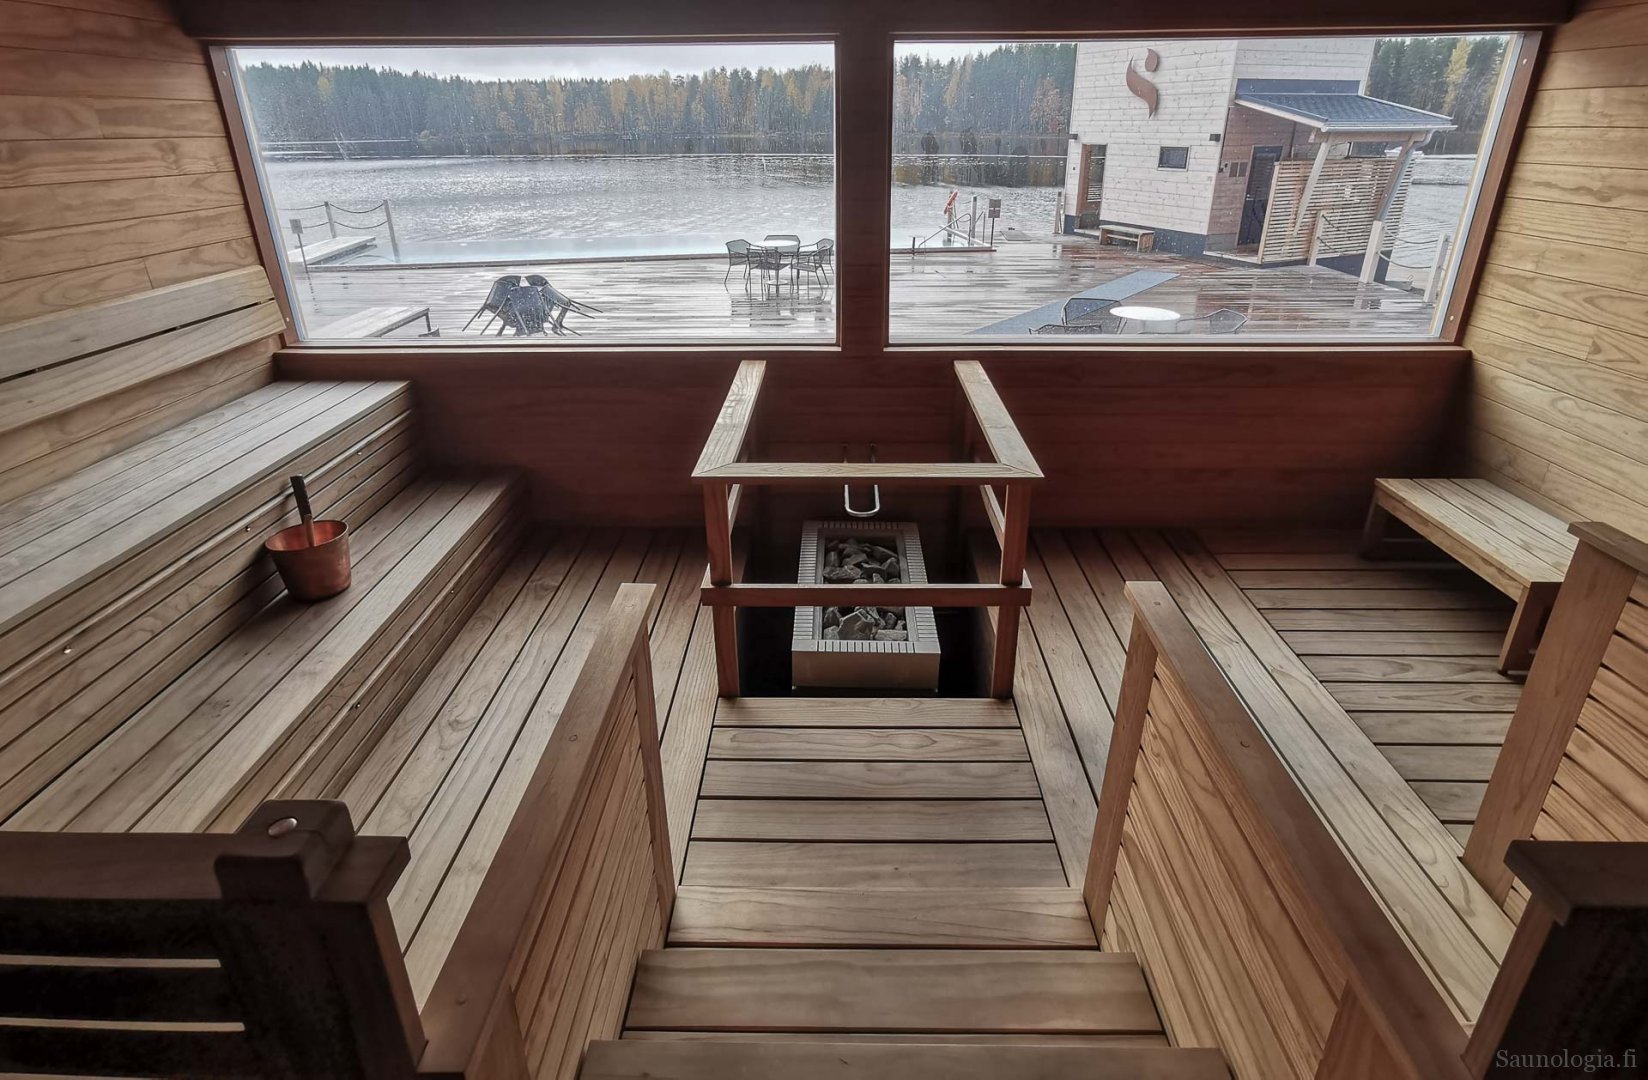
Window is a good solution for lighting as long as you acknowledge the special requirements of the hot sauna room. Modern windows with very high energy efficient may be filled with gas that expands in the sauna temperature and breaks the window. If you wish to use the window for extra ventilation, e.g. to dry the sauna after use, you should have a wooden handle for opening it.
As you may know, In Finland, there are several months in the year when there’s hardly any natural light available. Here’s where the modern technology can come to rescure. Electric lighting, particularly modern LEDs allow creative lighting in sauna. Just make sure all electrics you install can withstand sauna temperature. For instance, standard LED lights won’t survive very long if you put them in the ceiling.
The placement of small LEDs or fibre optic lights allows you to specifically light up critical parts of the sauna room – or be very creative! The critical parts are the potential hazards: hot surfaces around the stove, the steps leading to the bench, hand railings, and so forth.
Exotice, extreme as well as subtle sauna lighting solutions:
Besides lighting other safety structures may be necessary. These typically include hand railings in connection with benches as well as safety railings around the stove. Depends on other details what kind of risks are present in the sauna room.
Door
The Finnish sauna door opens towards the outside of the room and can’t be locked from the other side (at least while the sauna is in use). These are two very important safety measures. Disobey and someone might get killed.
The door may leave a gap in the bottom to which ever room or space is next to. But the top part of the door must close tight, unless the sauna ceiling is very high and the benches as well.
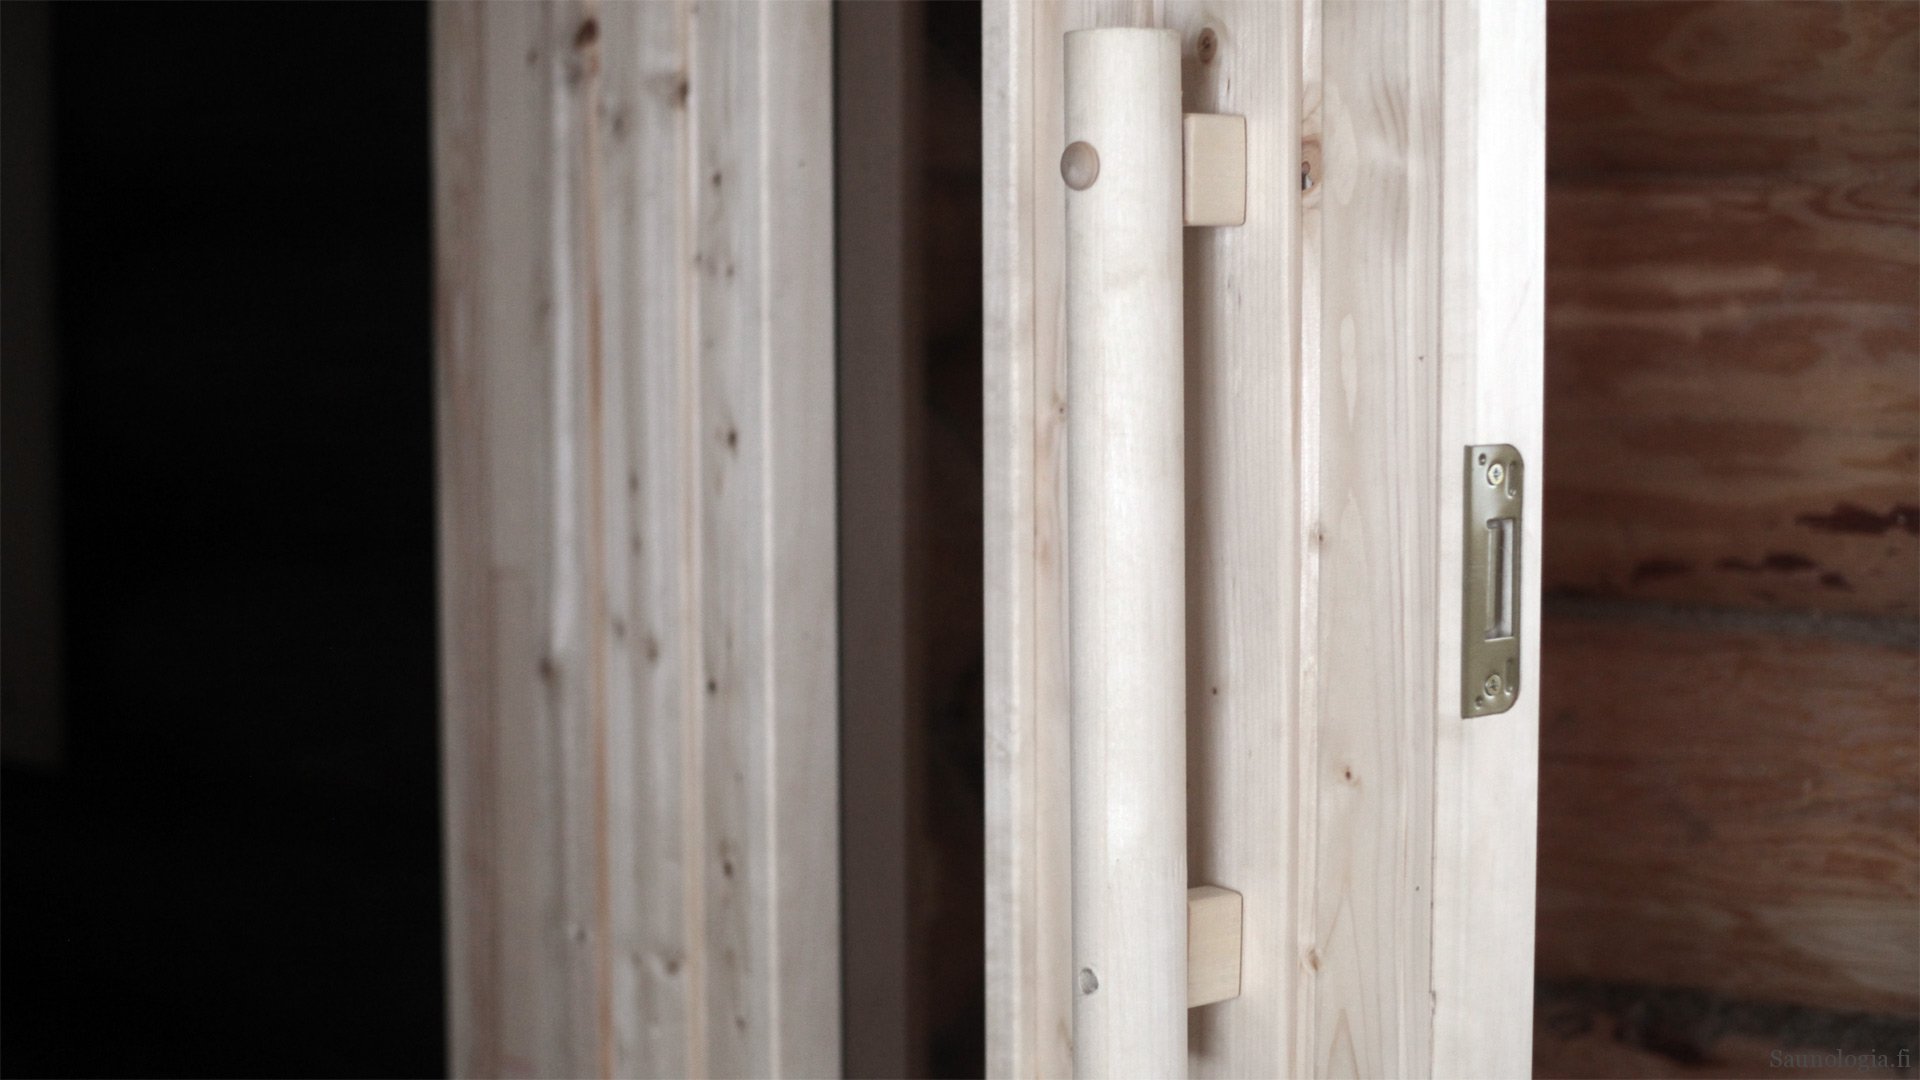
Besides this, there isn’t that much special with the sauna door. Traditional saunas had wooden doors without windows. Often the doors were much shorter than you’d have nowadays: maybe only 80 cm tall on top of a high doorsill. This helps to keep warm and humid air inside the sauna. Contemporary Finnish saunas tend to have glass doors that are immune to humidity, heat, and mold but otherwise don’t make such a great solution. Having a sauna door custom made by a carpenter is always an option. And while you’re at it, you can have even several doors if that suits your needs!
Solve the sauna design puzzle!
This article concludes my introduction to the Finnish sauna design secrets: the Finnish sauna essentials article series. I hope to have conveyed you approximately what goes into Finnish sauna proceedings and what an interesting puzzle the design of a Finnish sauna is.
As this article shows, the number of individual design choices is huge. In my opinion you should start by making the bigger decisions first and then dive into each area of detail:
- Overall sauna facilities: how big and tall are they, what supporting spaces are available
- Heating solution and requirement of flue/electricity
- Ventilation solutions
- Interior design: bench configuration
- Windows and lighting
- Ceiling and wall materials
- Door and floor
The fun part of the puzzle is that each choice may affect other decisions you’ve made earlier and will make in the future. There’s much iteration to get all pieces in place, but it’s possible 🙂
Key dimensions table with unit transformations from metric to imperial
| Target | Metric | Imperial |
|---|---|---|
| Maximum distance: bench to ceiling | 120 cm | 4’ |
| Maximum distance: bench to ceiling | 100 cm | 3’ 4” |
| Height: from the foot bench to top bench | 45 cm | 1’ 6” |
| Minimum Top bench depth | 60 cm | 2 ‘ |
| Recommended seat width | 60 cm | 2’ |
That’s it! It took me almost two years to finish this article series. Now that it’s done, I will next start working on a book, which will elaborate these topics and hopefully be done with in a breeze! Stay tuned.
Need more information?
Saunologia Finnish Sauna consultation services in your service! We provide personal consultation in plain English! It is our pleasure to help you with projects of all size remotely and on site anywhere you need in the world.
If you want to guarantee a great Finnish sauna experience from your design, contact us first, prevent costly design mistakes and ensure blissful sauna for public or private use!
