Improving A Barrel Sauna – A Case Study
Saunologia presents a case study in improving ventilation and heat stratification of a barrel sauna. Esteemed sauna guest Mika Javanainen describes his successful experiment in rigging up a full mechanical ventilation for his barrel sauna. This experiment is a great example of improving barrel experience with relatively small investments!
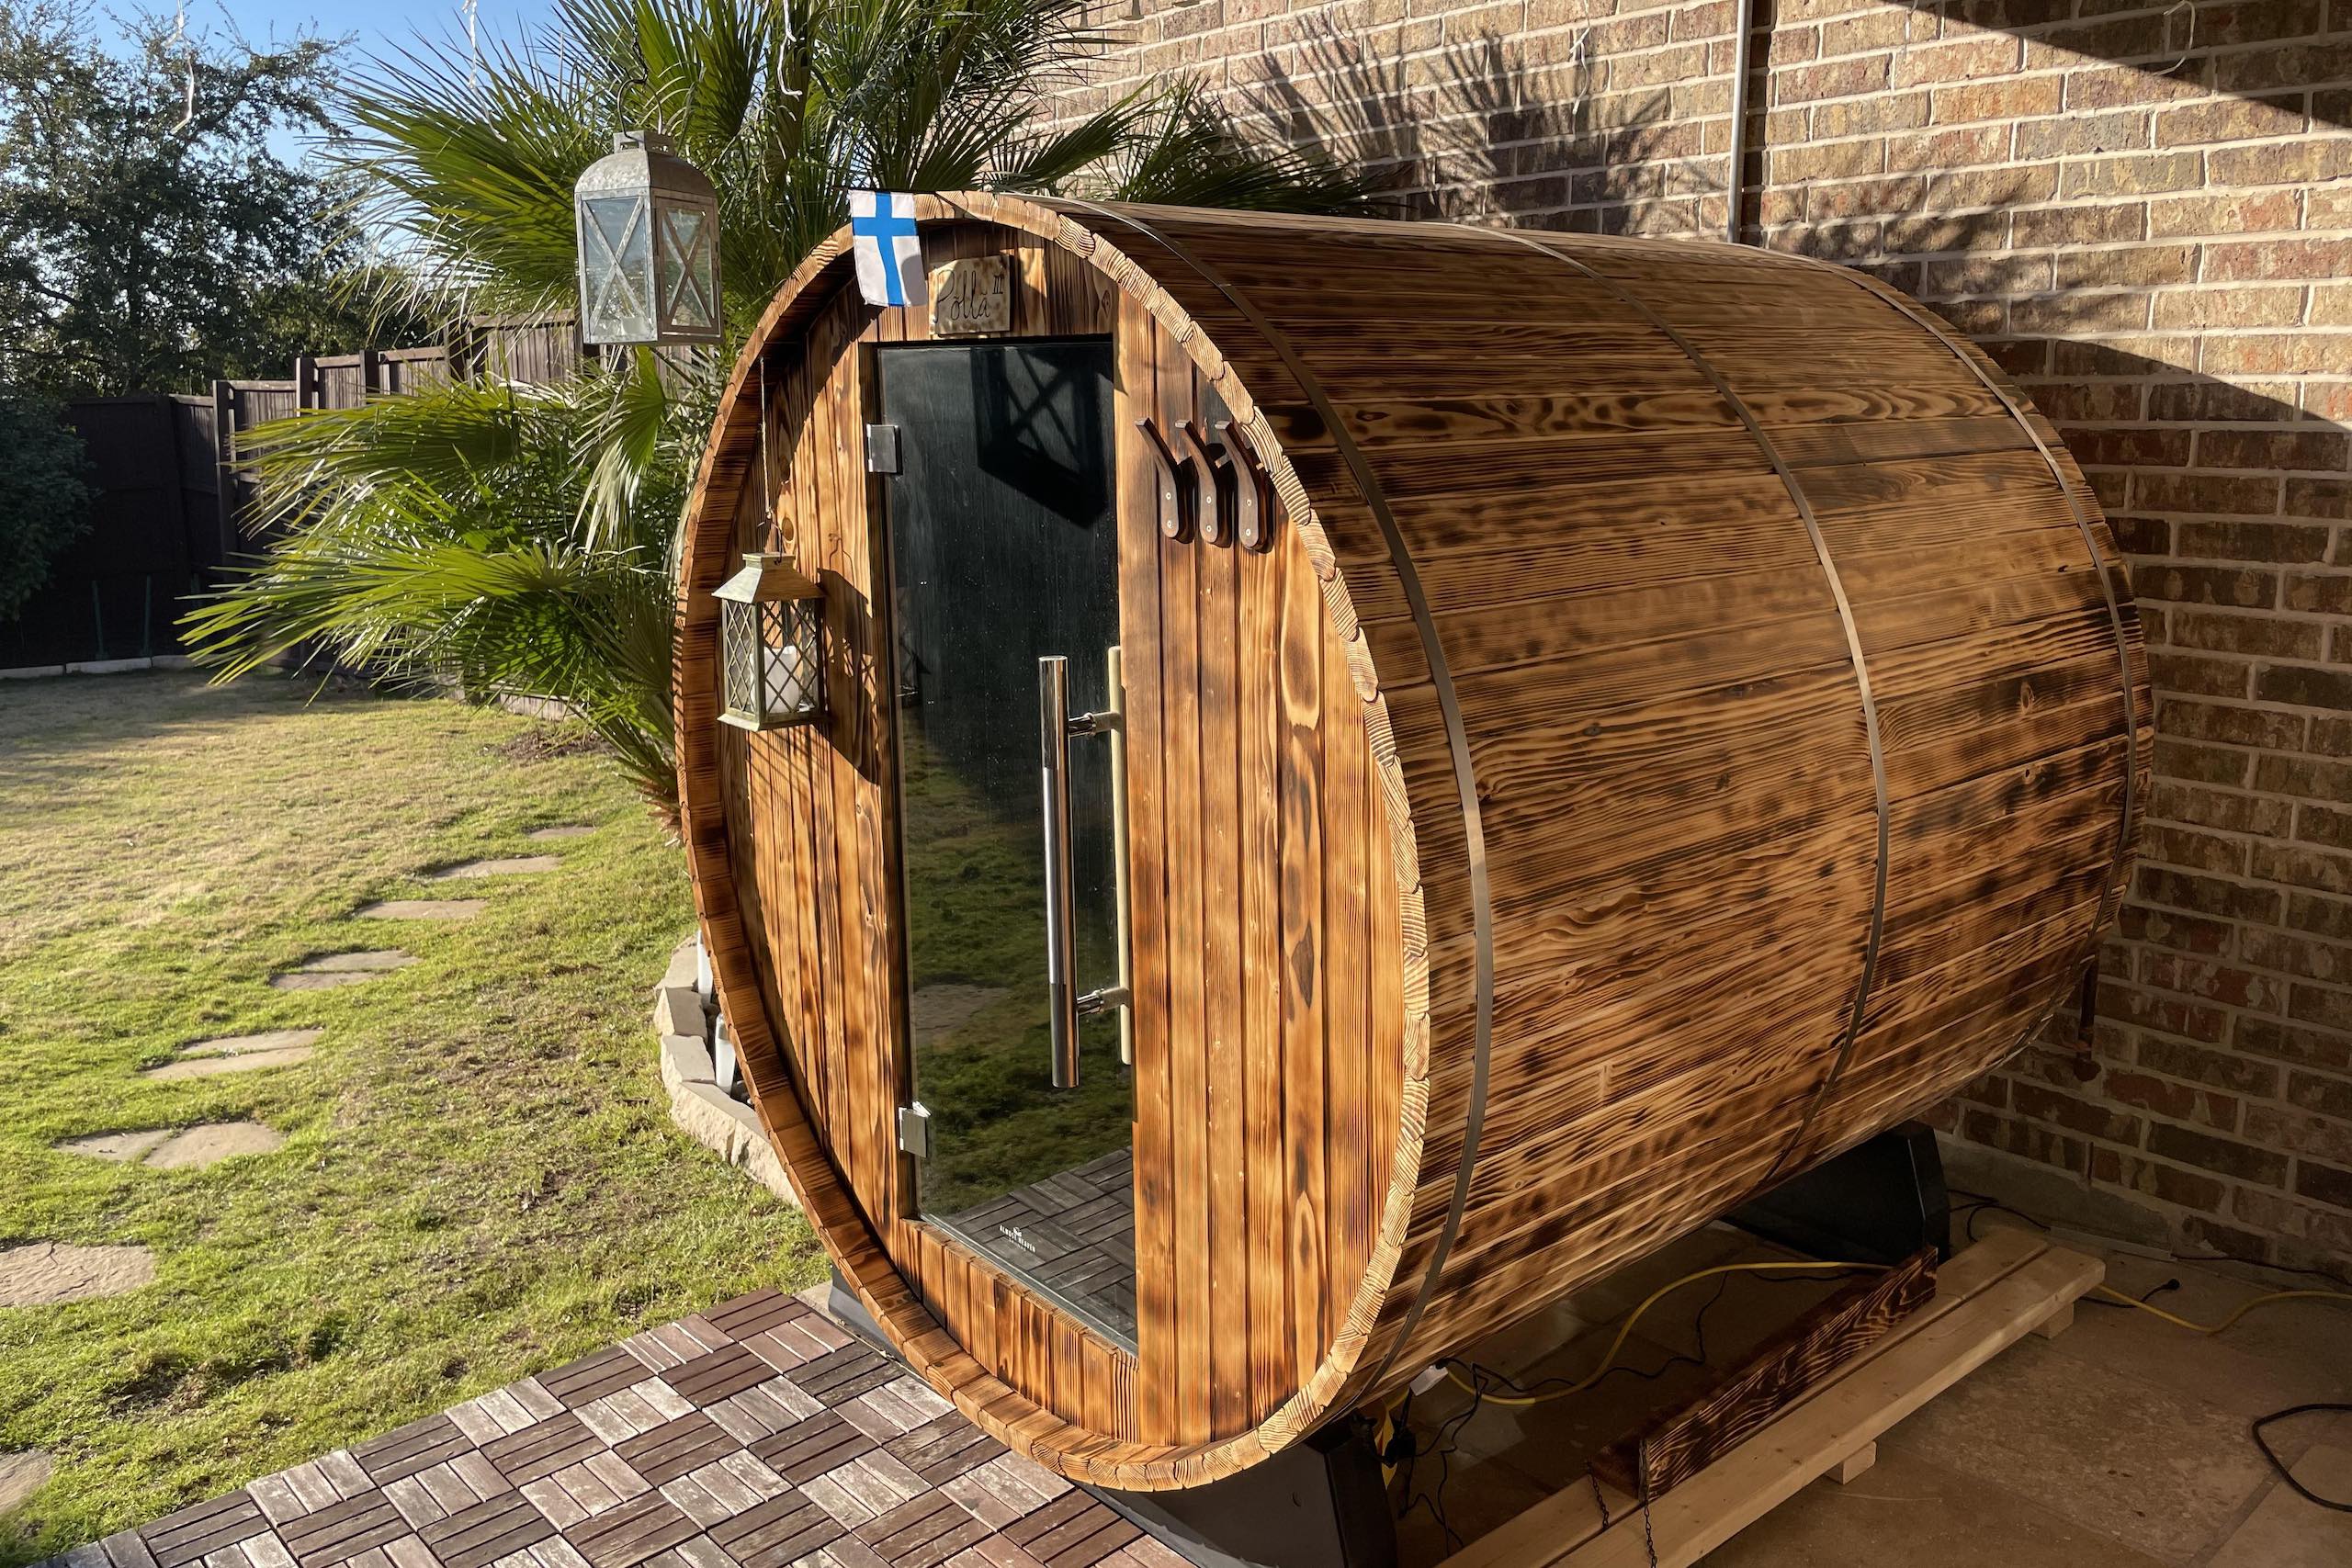
Barrel saunas have quickly become a common first step into the world of sauna in North America. They are easy to fit in a backyard, relatively inexpensive, and they look cool.
However, many first-time barrel sauna owners have discovered distinct downsides the barrel structure comes with. The two biggest issues are ventilation and heat stratification. This has been discovered by several users, resulting in multiple conversation threads in different sauna Facebook sauna groups and Reddit.
The issues
The so-called law of löyly (steam) suggests that your feet should be above the top of the stove for an even heat and steam experience. In contrast, in barrel saunas, you keep your feet on the floor.
In barrel saunas ventilation is often gravity based. Air intake is on the floor level below the heater, and the exhaust is high on the opposite wall.
This cross ventilation is the easiest way to guarantee some ventilation. The downside is that it creates draft on the floor, further increases heat stratification, and results in energy loss.
As a barrel sauna owner and as an avid sauna-goer, I cannot really say that I was bothered by any of these issues but got interested to look into this.
What can be measured, must be measured!
Electric Sauna Ventilation in Theory
There are multiple quality articles about sauna temperatures and ventilation available online. I’ve found these masterpieces the most useful:
- Saunologia.fi – Finnish Sauna Essentials Part 5 – Air quality
- VTT Research – Temperature and ventilation of the Finnish Sauna, 1992 (in Finnish)
Some of these studies suggest that by implementing mechanical ventilation and by pushing air from above the stove and sucking it out from the floor level might reduce heat stratification.
I wanted to test this.
I placed three temperature and humidity sensors in my sauna: one on the ceiling, one on the bench level and one on the floor, below the door. These sensors write their readings in a database in about five-second intervals.
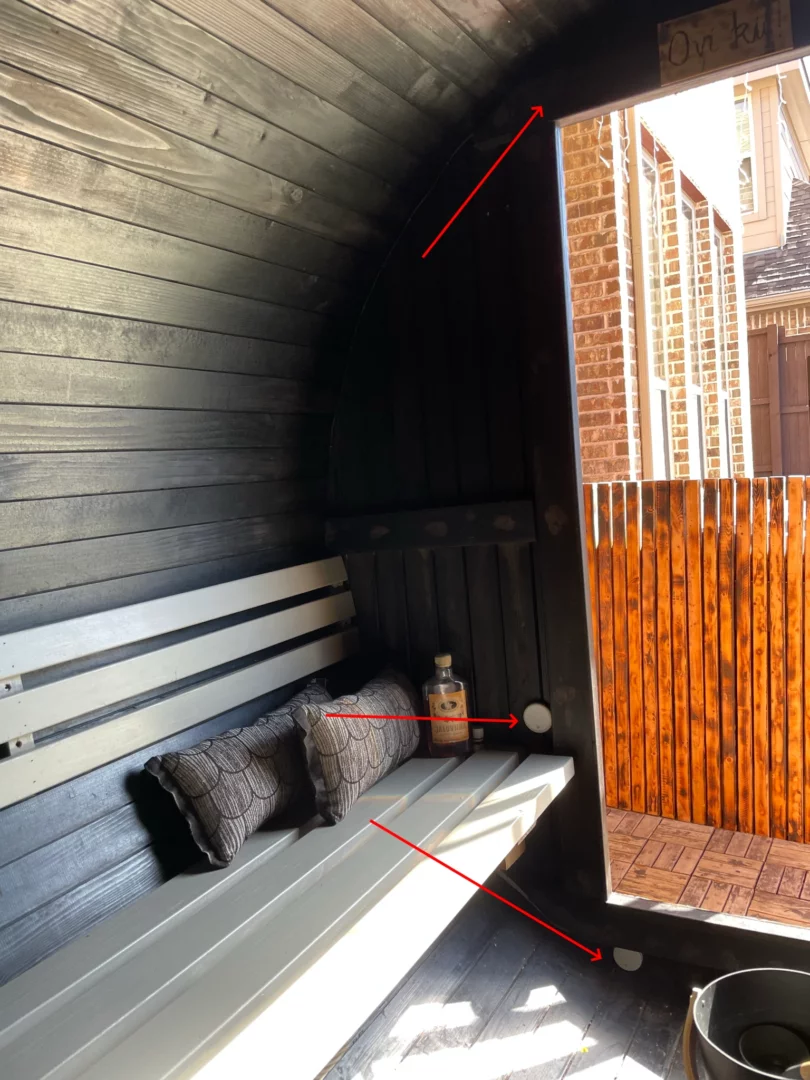
I bought a pair of AC Infinity RAXIAL S4 fans for about $30 each. For fan control, I also got a few WiFi plugs so that I could turn the vents on and off using my sauna app. I drilled one 4” hole about 3 feet above the top of the stove and used flex air aluminium foil ducting dryer vent hose for the inlet:
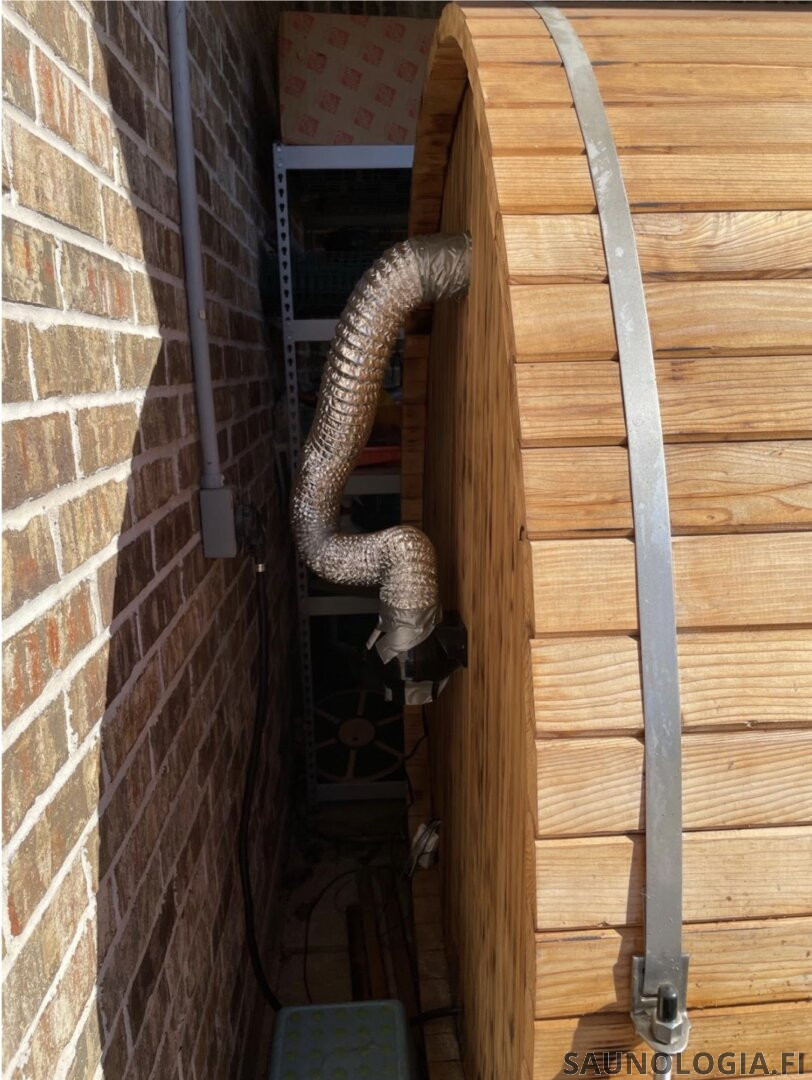
Similarly, I drilled a 4” hole under the bench on the opposite side of the stove to suck the hot air out.
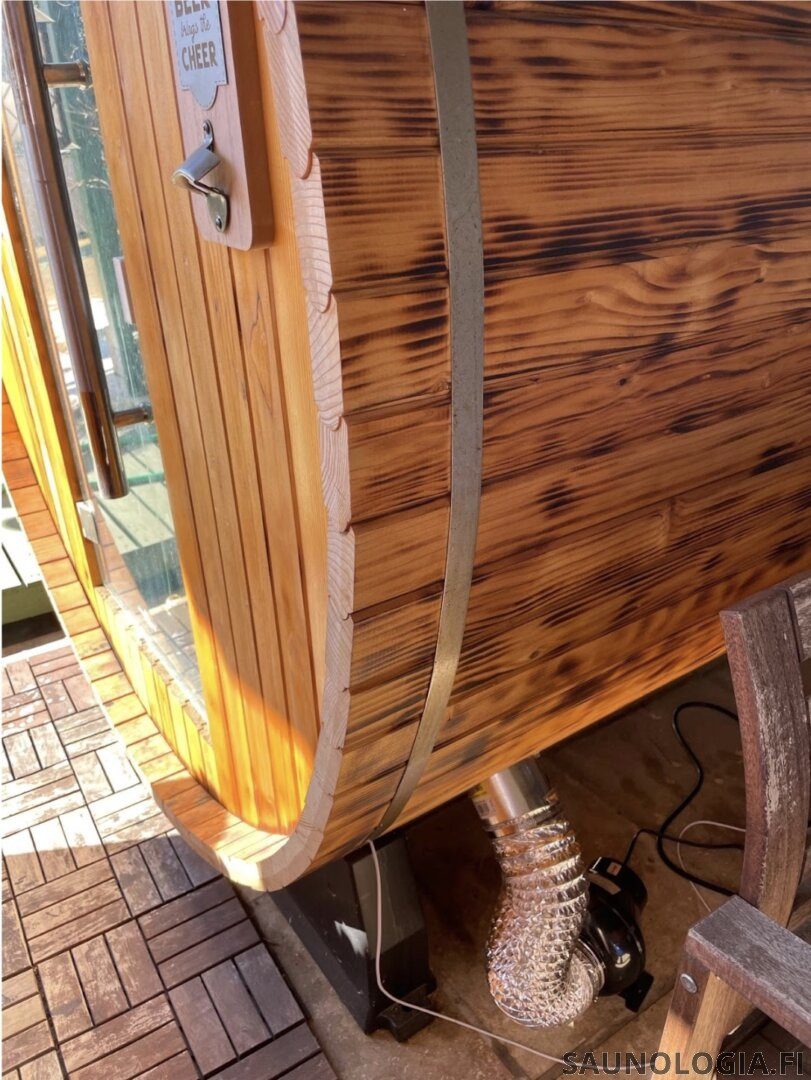
These fans are adjustable and quiet (28dB at full power). The maximum power is 105 cubic feet per minute, which is about 50 liters per second. The flexible duct hose reduces airflow, but I concluded that the power of these fans should be sufficient for this experiment.
The sources I have read suggest that we should circulate 3-7 liters per m2 per second. That recommendation is likely for a square-shaped sauna though. Measured at the exhaust on full power, the flow was 18 liters per second.
My barrel sauna has a radius of 180 cm and it is 180 cm long, so the maximum area is about 3.2 m2, total volume 4.6 m3. The sauna is powered by a 6 kW electric heater. This means that the sauna air is exchanged over 10 times an hour!
Experiment 1 – baseline numbers without ventilation
At first, I wanted to get the baseline numbers without mechanical ventilation. I shut down the ventilation, which essentially simulated the out-of-the-box gravity-based cross ventilation. The recommendation is to keep the outlet vent closed during the steam.
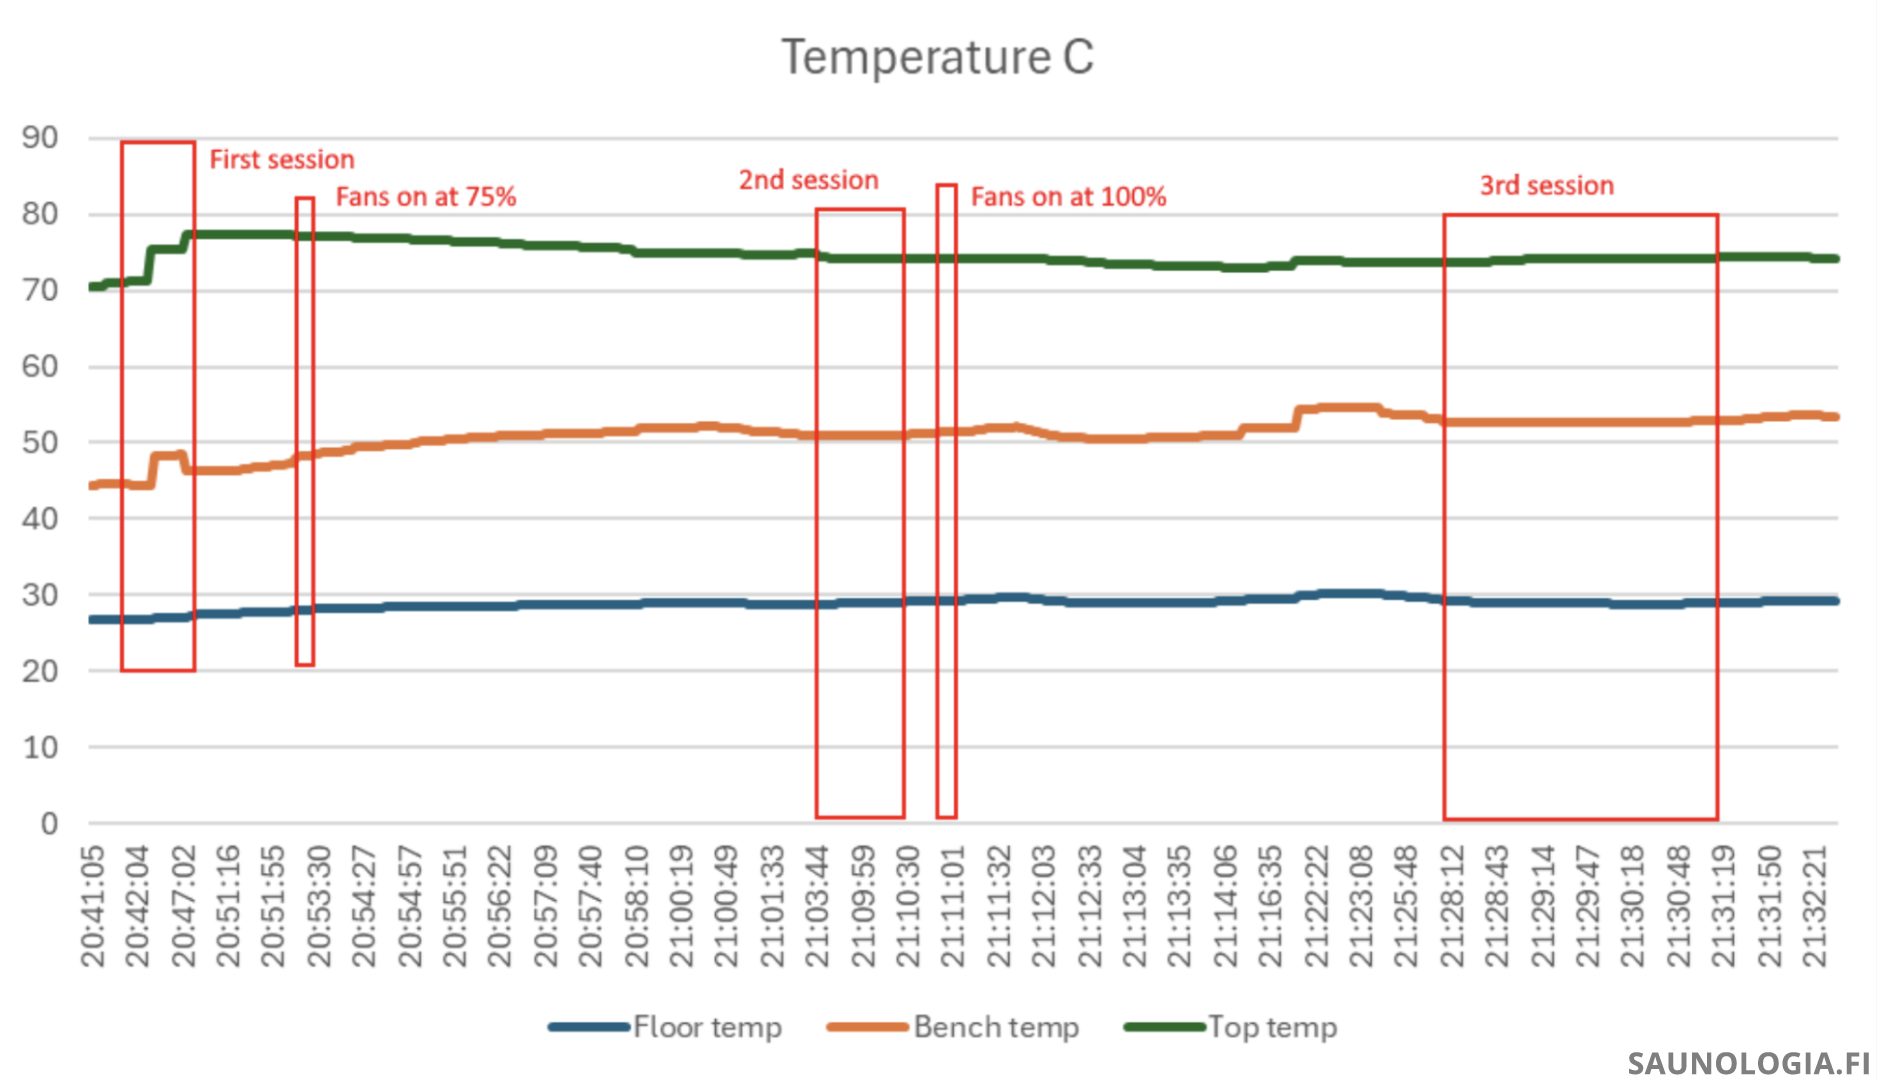
After the first session, I switched the fans on at around 75% power and let them circulate the air for 10 minutes while the stove was on before starting the second session. I tried to get humidity back to where it was at the beginning of the session.
After the second session, I increased the power of the fans to 100% and started the third session:
The results were the following:
| Condition | Top temperature C | Top humidity g/m3 | Bench temperature C | Bench humidity g/m3 | Floor temperature C | Floor humidity g/m3 |
|---|---|---|---|---|---|---|
| No Ventilation | ||||||
| at the beginning | 71.3 | 64 | 44.4
(62%) |
25 | 26.8
(38%) |
15 |
| peak | 75.4 | 133 | 48.4
(64%) |
77 | 27.1
(36%) |
21 |
| Ventilation at 75 % | ||||||
| at the beginning | 74.4 | 73 | 50.9
(68%) |
32 | 28.6
(38%) |
20 |
| peak | 74.2 | 180 | 51.4
(69%) |
88 | 29.3
(39%) |
29 |
| Ventilation at 100% | ||||||
| at the beginning | 73.7 | 68 | 52.6
(71%) |
32 | 29.1
(39%) |
21 |
| peak | 74.3 | 179 | 52.9
(71%) |
91 | 28.9
(39%) |
29 |
percentages in brackets: heat stratification
First session
At the beginning of the first session, the temperature on the bench level was 38% less than on the top. The outside temperature was about 16 C, so the floor was only 10 C warmer than outside temperature. This is quite typical in barrel saunas, based on my experience. Your feet definitely feel cold in winter.
The humidity on the top increased quite a lot during the steam even without ventilation: by 69 g/m3 on the top and by 52g/m3 on the bench level. The temperature rose quickly by about 4c probably because the steam is warmer than the air.
The second session
At the beginning of the second session, the fans had already mixed the air so the temperature on the bench level had raised to 50.9c which was 68% of the top temperature (compared to 62% at the beginning of the first session).
The ventilation seemed to increase humidity in general. I think this might be because the fans blow fresh cold air to near the ceiling level.
During the steam, the ceiling temperature dropped by 1c compared to the first session, but the bench level temperature was 3c higher.
The third session
For the third session, I set the power of the fans to the max. The main impact of this seemed to be about 1.5c further increase in bench level temperature.
Conclusions
I have been using mechanical ventilation in my sauna for about two years now. My gut feeling as well as the results of this test prove that it is relatively easy to reduce heat stratification in a barrel sauna by adding an inlet vent above the stove and an exhaust vent below the bench. As the graph below shows, the temperature difference between the top and the bench level reduces.
I have found out that it takes at least 10-15 minutes to mix the air with these fans, so I usually keep the fans switched off during the heat up (the sauna heats faster and consumes less energy) and switch them off about 10 minutes before I start the first session.
The ventilation solution has not solved the issue of the cold floor. You can see from the diagrams above that the floor temperature increases a little bit with ventilation, but the difference even to the bench level is still about 20c. I have found out that it is just best to keep the feet on the opposite bench during the sessions.
The absolute humidity graphs below illustrate the times I threw löyly. Ventilation seems to increase the humidity in general. The difference on the bench level does not seem radical, but it actually is: during the second session the humidity climbed to 90 g/m3, up from a bit less than 80 during the first session. That plus increased temperature on the bench level definitely makes you feel more sweaty: the dew point increases above the body temperature and the steam starts condensing on your skin.
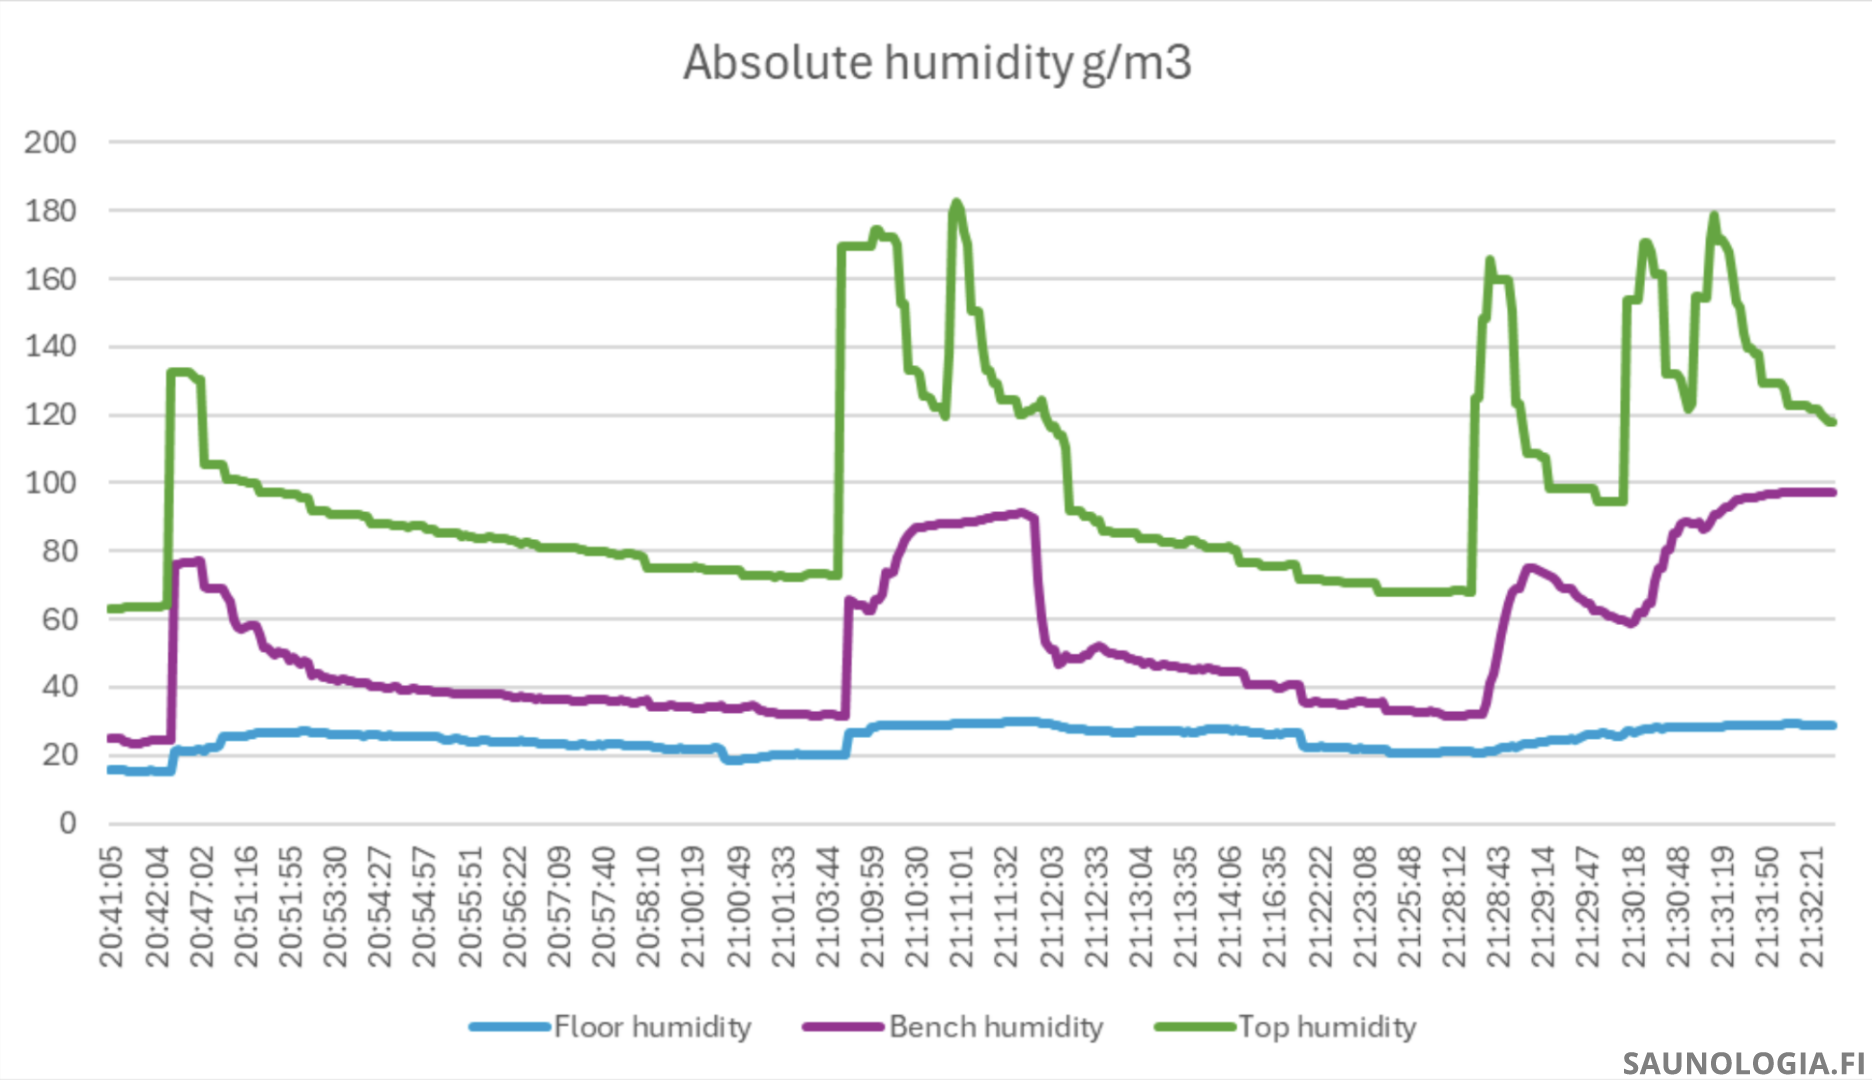
Finally, the floor level humidity seems low in absolute terms in comparison to bench and ceiling. That is due to the low temperature. 29g/m3 absolute humidity at 29 C temperature means 100% relative humidity, it is fully saturated.
Other barrel sauna hacks
In addition to this ventilation hack, I also added an extra bench that slides in and out. It allows me to sit higher up and keep my feet on the opposing bench. I have also lowered the stove two inches so the benches are now closer to the top of the stove.
Huge thanks Mika for the opportunity to publish this improved version of a story that originally appeared on Hakkasauna. We also congratulate Mika for showing exceptional saunological spirit in taking his sauna tuning to the extreme – here for everyone’s benefit.
